![]()
Stacking Arduino Motor Shields


See notes in MotorDrivers.h for the jumpering instructions needed to use two stacked standard Arduino Motor Shields to get 4 motor outputs. https://github.com/DCC-EX/CommandStation-EX/blob/4125e73318a7b06a3723c443bc9c56da890b9fcd/MotorDrivers.h#L204
The following are some notes by Kevin Smith taken directly from Discord.
Stacked Standard Motor Shields L298P
On this one I have the MakerFab WiFi shield at the bottom of the stack because I wanted easier access to the I2C male pins on the top of the Motor Shields
The first Motor Shield has the VIN cut on the bottom of the PCB, Otherwise you would bend that Vin pin out also. I use the A2 and A3 sensor pins instead of the A4 and A5, just a personal preference.
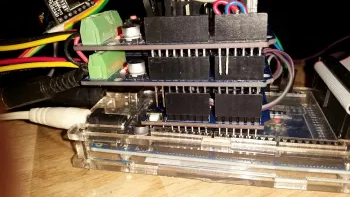
Stacked Arduino Motor Shields 1
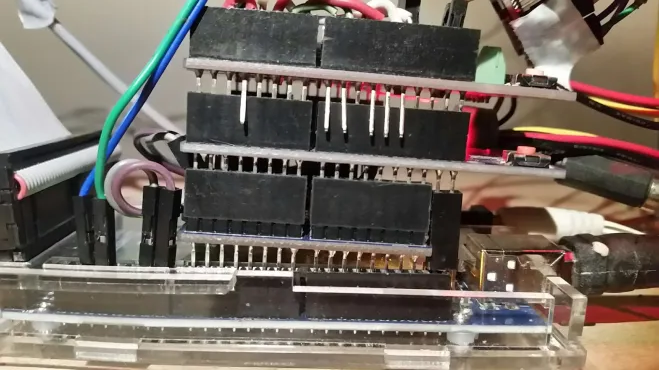
Stacked Arduino Motor Shields 2
Short single wire jumpers are preferred, and that is the DFPLayer mini MP3 sound player stuck under the front edge and powered off of the top motor shield back end purple and black wires.
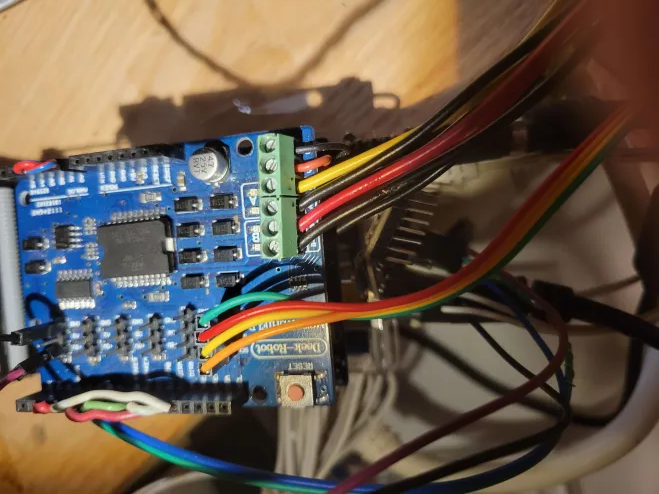
Stacked Arduino Motor Shields 3
Yes you can stack two shields. They will try to use the same pins as each other, you have to bend out some pins of the top shield and jumper them to other Arduino pins.
You can define your own motor shield in config.h, it tells you how. Be sure to use a unique name for it. Look in MotorDrivers.h, there is an example shield definition for 4 tracks using two stacked standard shields. It also gives jumpering instructions, but check that yours is the same, I think it will be.
Also which pins you choose for the second shield will depend which processor you are using, I expect that the example will be for a Mega. If the pins are ok, just use the example STACKED_MOTOR_SHIELD. Change the config.h from: #define MOTOR_SHIELD_TYPE STANDARD_MOTOR_SHIELD to
#define MOTOR_SHIELD_TYPE STACKED_MOTOR_SHIELD
If you need different pins, you would copy the example definition to your myAutomation.h, just this bit:
#define STACKED_MOTOR_SHIELD F("STACKED_MOTOR_SHIELD"),\
new MotorDriver( 3, 12, UNUSED_PIN, 9, A0, 2.99, 1500, UNUSED_PIN), \
new MotorDriver(11, 13, UNUSED_PIN, 8, A1, 2.99, 1500, UNUSED_PIN), \
new MotorDriver( 2, 10, UNUSED_PIN, 7, A4, 2.99, 1500, UNUSED_PIN), \
new MotorDriver( 5,  4, UNUSED_PIN, 6, A5, 2.99, 1500, UNUSED_PIN)
Then change its name and pins and change the #define MOTOR_SHIELD_TYPE nnnn to the new name.