WiTcontroller
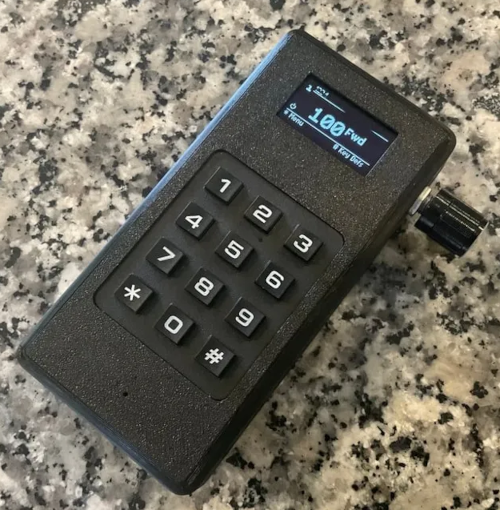
A WiTcontroller is a simple DIY, handheld controller that talks to a WiThrottle Server (JMRI, DCC-EX EX-CommandStation, Digitrax LnWi and many others) using the WiThrottle protocol to control DCC model trains.
Why WiTcontroller?
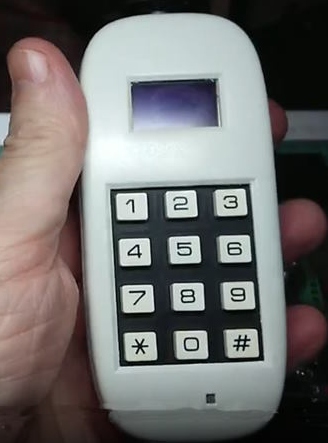 </img>
There are a number of excellent DIY DCC controllers available, but most require a lot of components and a lot of soldering. I wanted to create the simplest possible controller so that it would be as easy (as possible) to make one.
In its basic form, the WiTcontroller uses only four components plus a battery. You can even put it together without soldering, though I don’t recommend that for long term use.
While the basic form is simple, the design is flexible and you can add several additional components if you wish.
See a video of it in use here.
and another… (from GingeAngles)
and another… (from Sumner)
The name
WiTcontroller is a contraction of ‘WiThrottle Controller’ as it uses the WiThrottle Protocol for communications with the server. I pronounce it as ‘Wit Controller’, but you can pronounce it however you like.😊
[!NOTE]
- ‘WiThrottle’ is a trademark owned by Brett Hoffman. It is also an iOS app developed by Brett Hoffman.
- The ‘WiThrottle protocol’ is a communications protocol developed by Brett Hoffman. It is used by WiTcontroller, JMRI, Engine Driver, the WiThrottle app plus a number of other apps and DCC Command Stations. References in this document to a ‘WiThrottle Server’, refer to any server that can communicate using the ‘WiThrottle protocol’.
Index / Contents
- Prerequisites
- Building
- Loading the Code
- Using WiTcontroller
- Allowed Actions
- Options and Extras
- Contact Me
- Modifying the code
- Change Log
Prerequisites
-
Some basic soldering skills.
The components will work if just plugged together using jumpers, but they take a lot of space that way, so soldering them together is advised to make it more hand held.
-
Loading the code (sketch) requires downloading of one of the IDEs, this sketch, the libraries, etc. so some experience with Arduinos is helpful, but not critical.
-
A WiThrottle Server to connect to. WiTcontroller will work with any WiThrottle Server. e.g.
- JMRI
- DCC-EX EX-CommandStation
- MRC WiFi
- Digitrax LnWi
- NCE WiFiTrax
- and others
Note that there seems to be an issue with the YaMoRC Command Station that I am still working on. See the notes for the DEFAULT_HEARTBEAT_PERIOD define below.
Building
Required Components
-
WeMos Lite LOLIN32 (ESP32 Arduino with LiPo charger) (Example)
Note: Any ESP32 will work but the pinouts may need to be adjusted, and a separate LiPo charger may be required
[!CAUTION] I have reports of some of the versions of this board with the USB-C connectors having problems with the WiFi. Some are clearly fine, but others are not. I am still investigating this, but I would recommend avoiding the USB-C version for now.
-
3x4 Keypad (Example)
Notes:
- Alternately a 4x4 keypad can also be used (see optional components below)
- Different keypad manufacturers may arrange the pins on the base of the keypad differently.*** See notes in the Default Pins for the keypads section below.
-
KY-040 Rotary Encoder Module (Example)
Notes:
The EC11 rotary encoder will also work, but requires a small configuration change in
config_buttons.h(see below) -
OLED Display 0.96” 128x64 I2C IIC SSD1306 (Example)
Notes:
- The code for the one of the common 1.3” displays is also included (see below).
- Some OLED displays up to 2.4 inch will also work (see below)
-
Polymer Lithium Ion Battery LiPo 400mAh (or larger) 3.7V 502535 JST Connector. (500mAh Example)
Notes:
- Any capacity battery will work. A 400mAh will give about 6 hours of run time.*
[!CAUTION] I have found that some batteries come with the positive and negative leads the other way around to the terminals on the ESP32. Check they are correct before plugging it in!
The polarity of the battery is easy to swap, by getting a knife blade under the small tabs on the plastic connector and pulling each male socket out. Take extreme care. DO NOT SHORT THE TERMINALS.
-
A Case to put it in. Links to a few different designs are below, but any box will do. My case was 3d printed for me (see below).
-
A Knob (Example)
-
Wire - If you plan to solder the connections, which is the recommended approach, then stranded, coloured wire is advisable. (Example)
Optional Components
-
Optional: A power switch. Push button or toggle.
The battery in WiTcontroller will last a week or two in deep sleep, but you may wish to add a power switch on the positive feed of the battery if you expect to leave it unused for long periods. -
Optional: You can use a 4x4 keypad instead of the 3x4 keypad.
Note: You will need to make a small configuration change inconfig_buttons.hfor this to work correctly. -
Optional: Up to eleven (11) additional push buttons can be added directly to the ESP32, each with their own independent commands. (Example)
-
Optional: A 1.3” or 2.4” OLED Display (128x64) can be used instead of the 0.96” OLED Display 128x64 (Example) Note: You will need to make a minor change in the config file for this to work correctly.
-
Optional: Though not recommended, it is possible to use a Potentiometer instead of the Rotary Encoder for throttle control. The code supports it if you make the appropriate configuration changes in
config_buttons.h. However this has had only limited testing.
This is documented to some degree in config_buttons_example.h if you wish to try it.
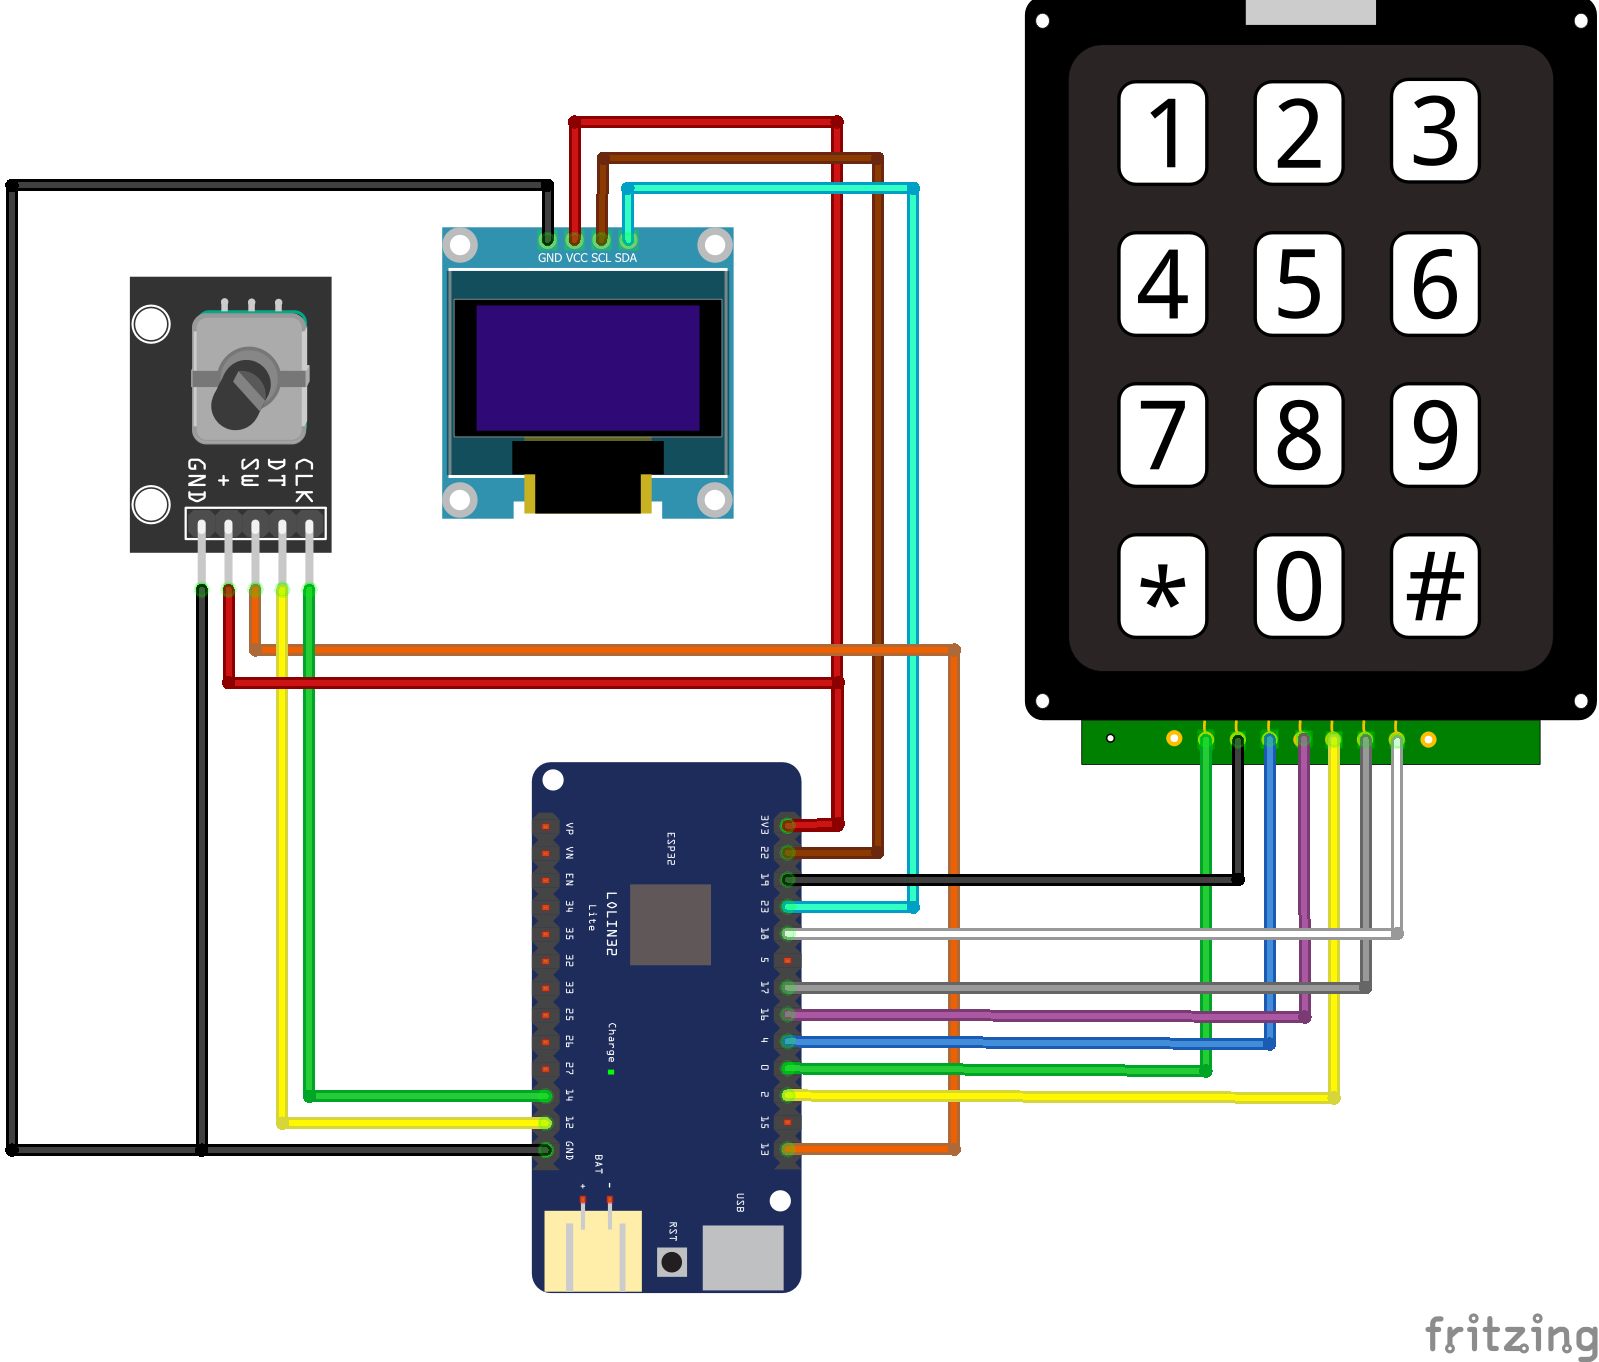
Pinouts
Standard Configuration Pinouts
This is the simplest form of the WiTcontroller
Pinouts for Optional Additional Buttons
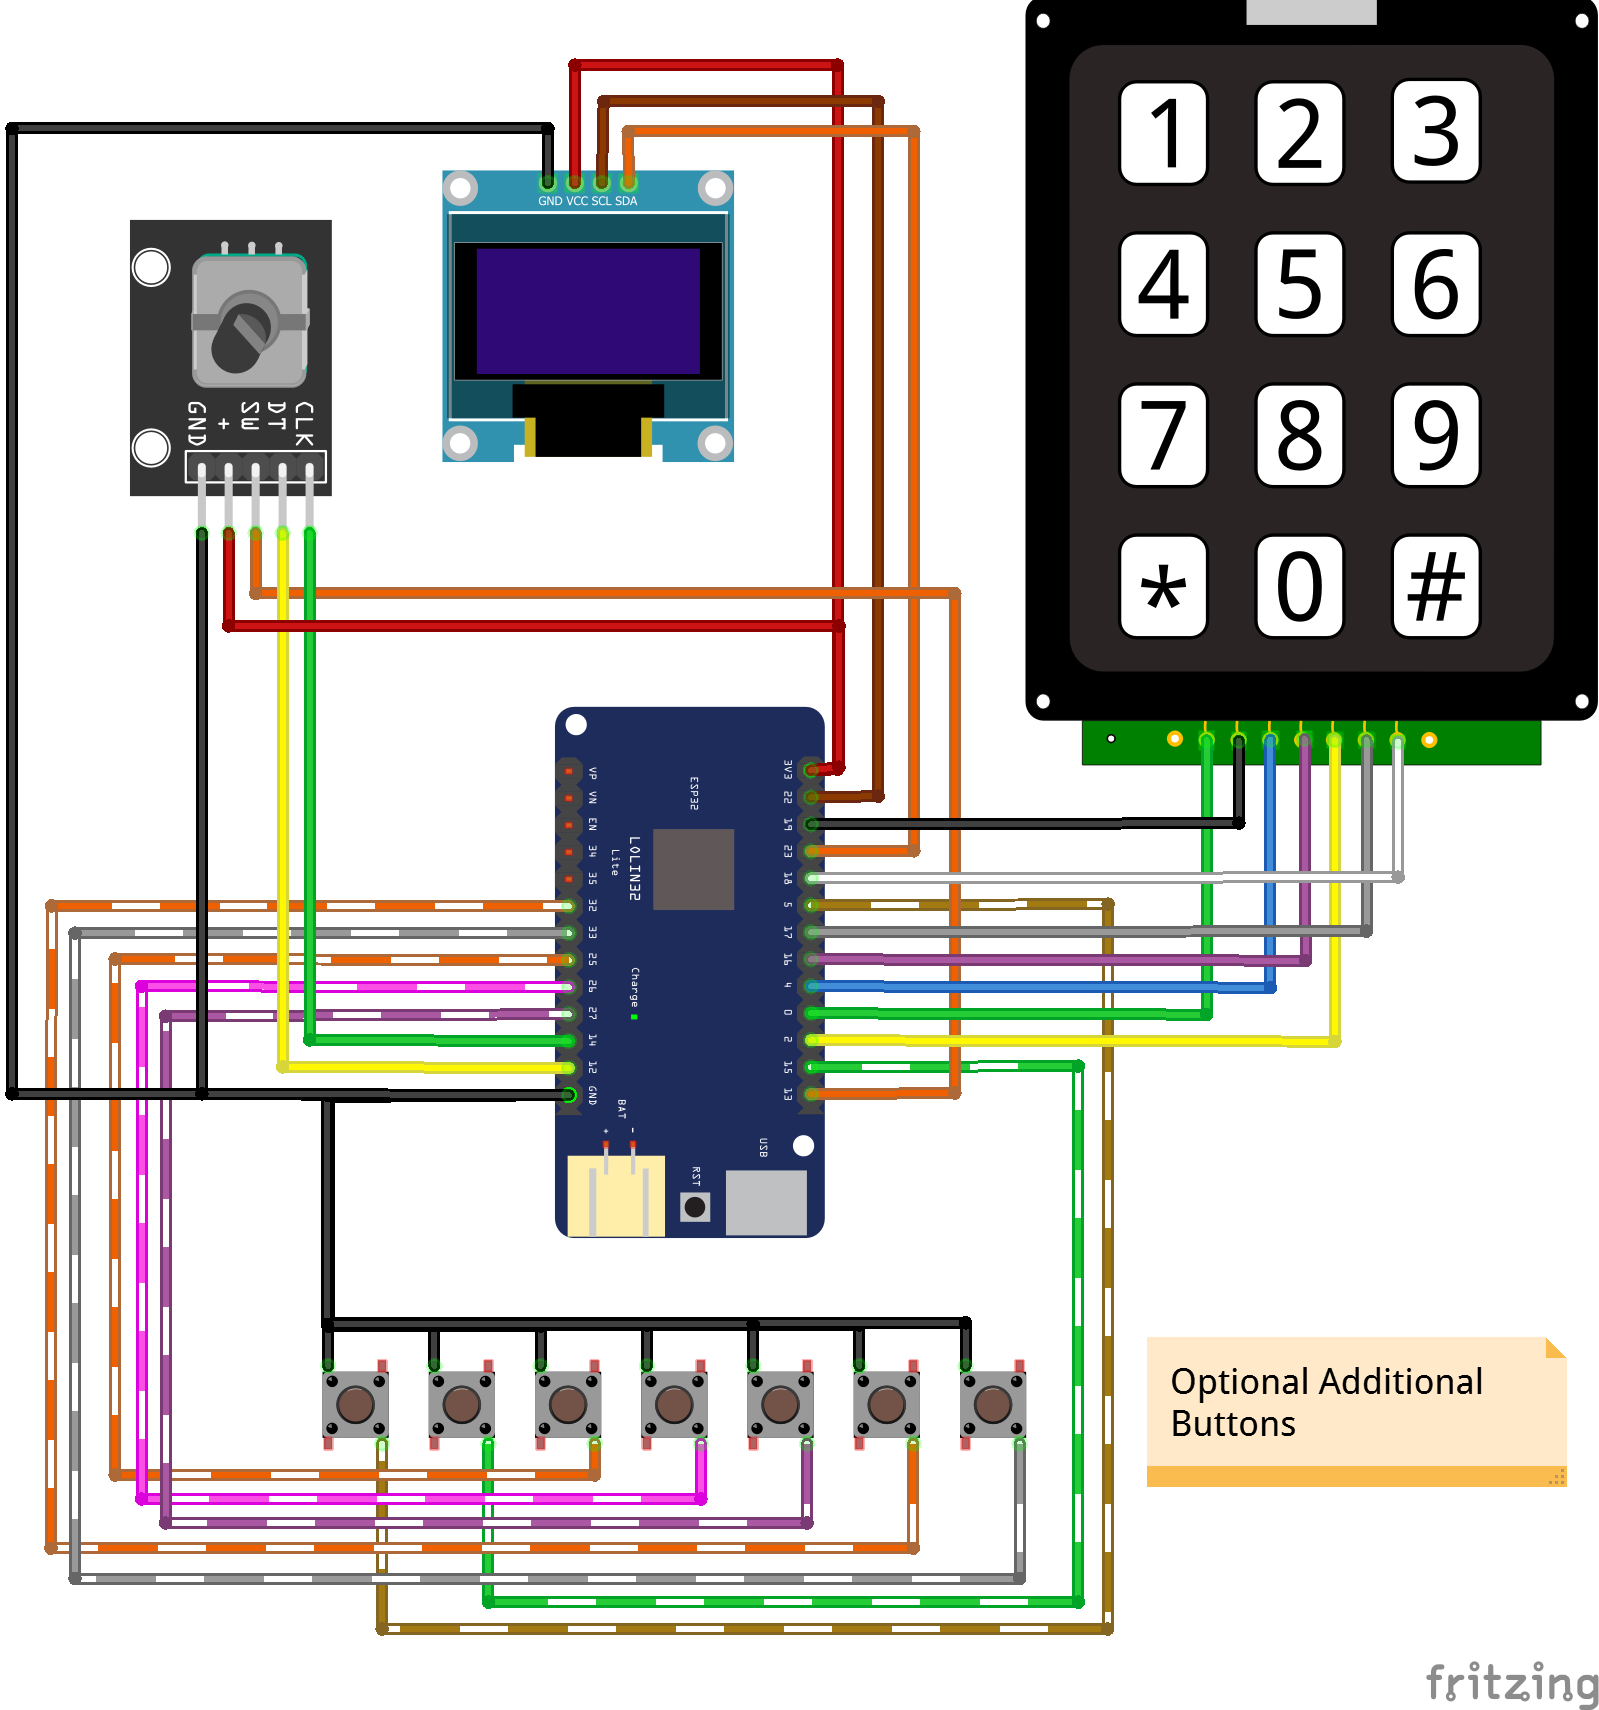
Pinouts for Optional Additional Buttons - With Pullups
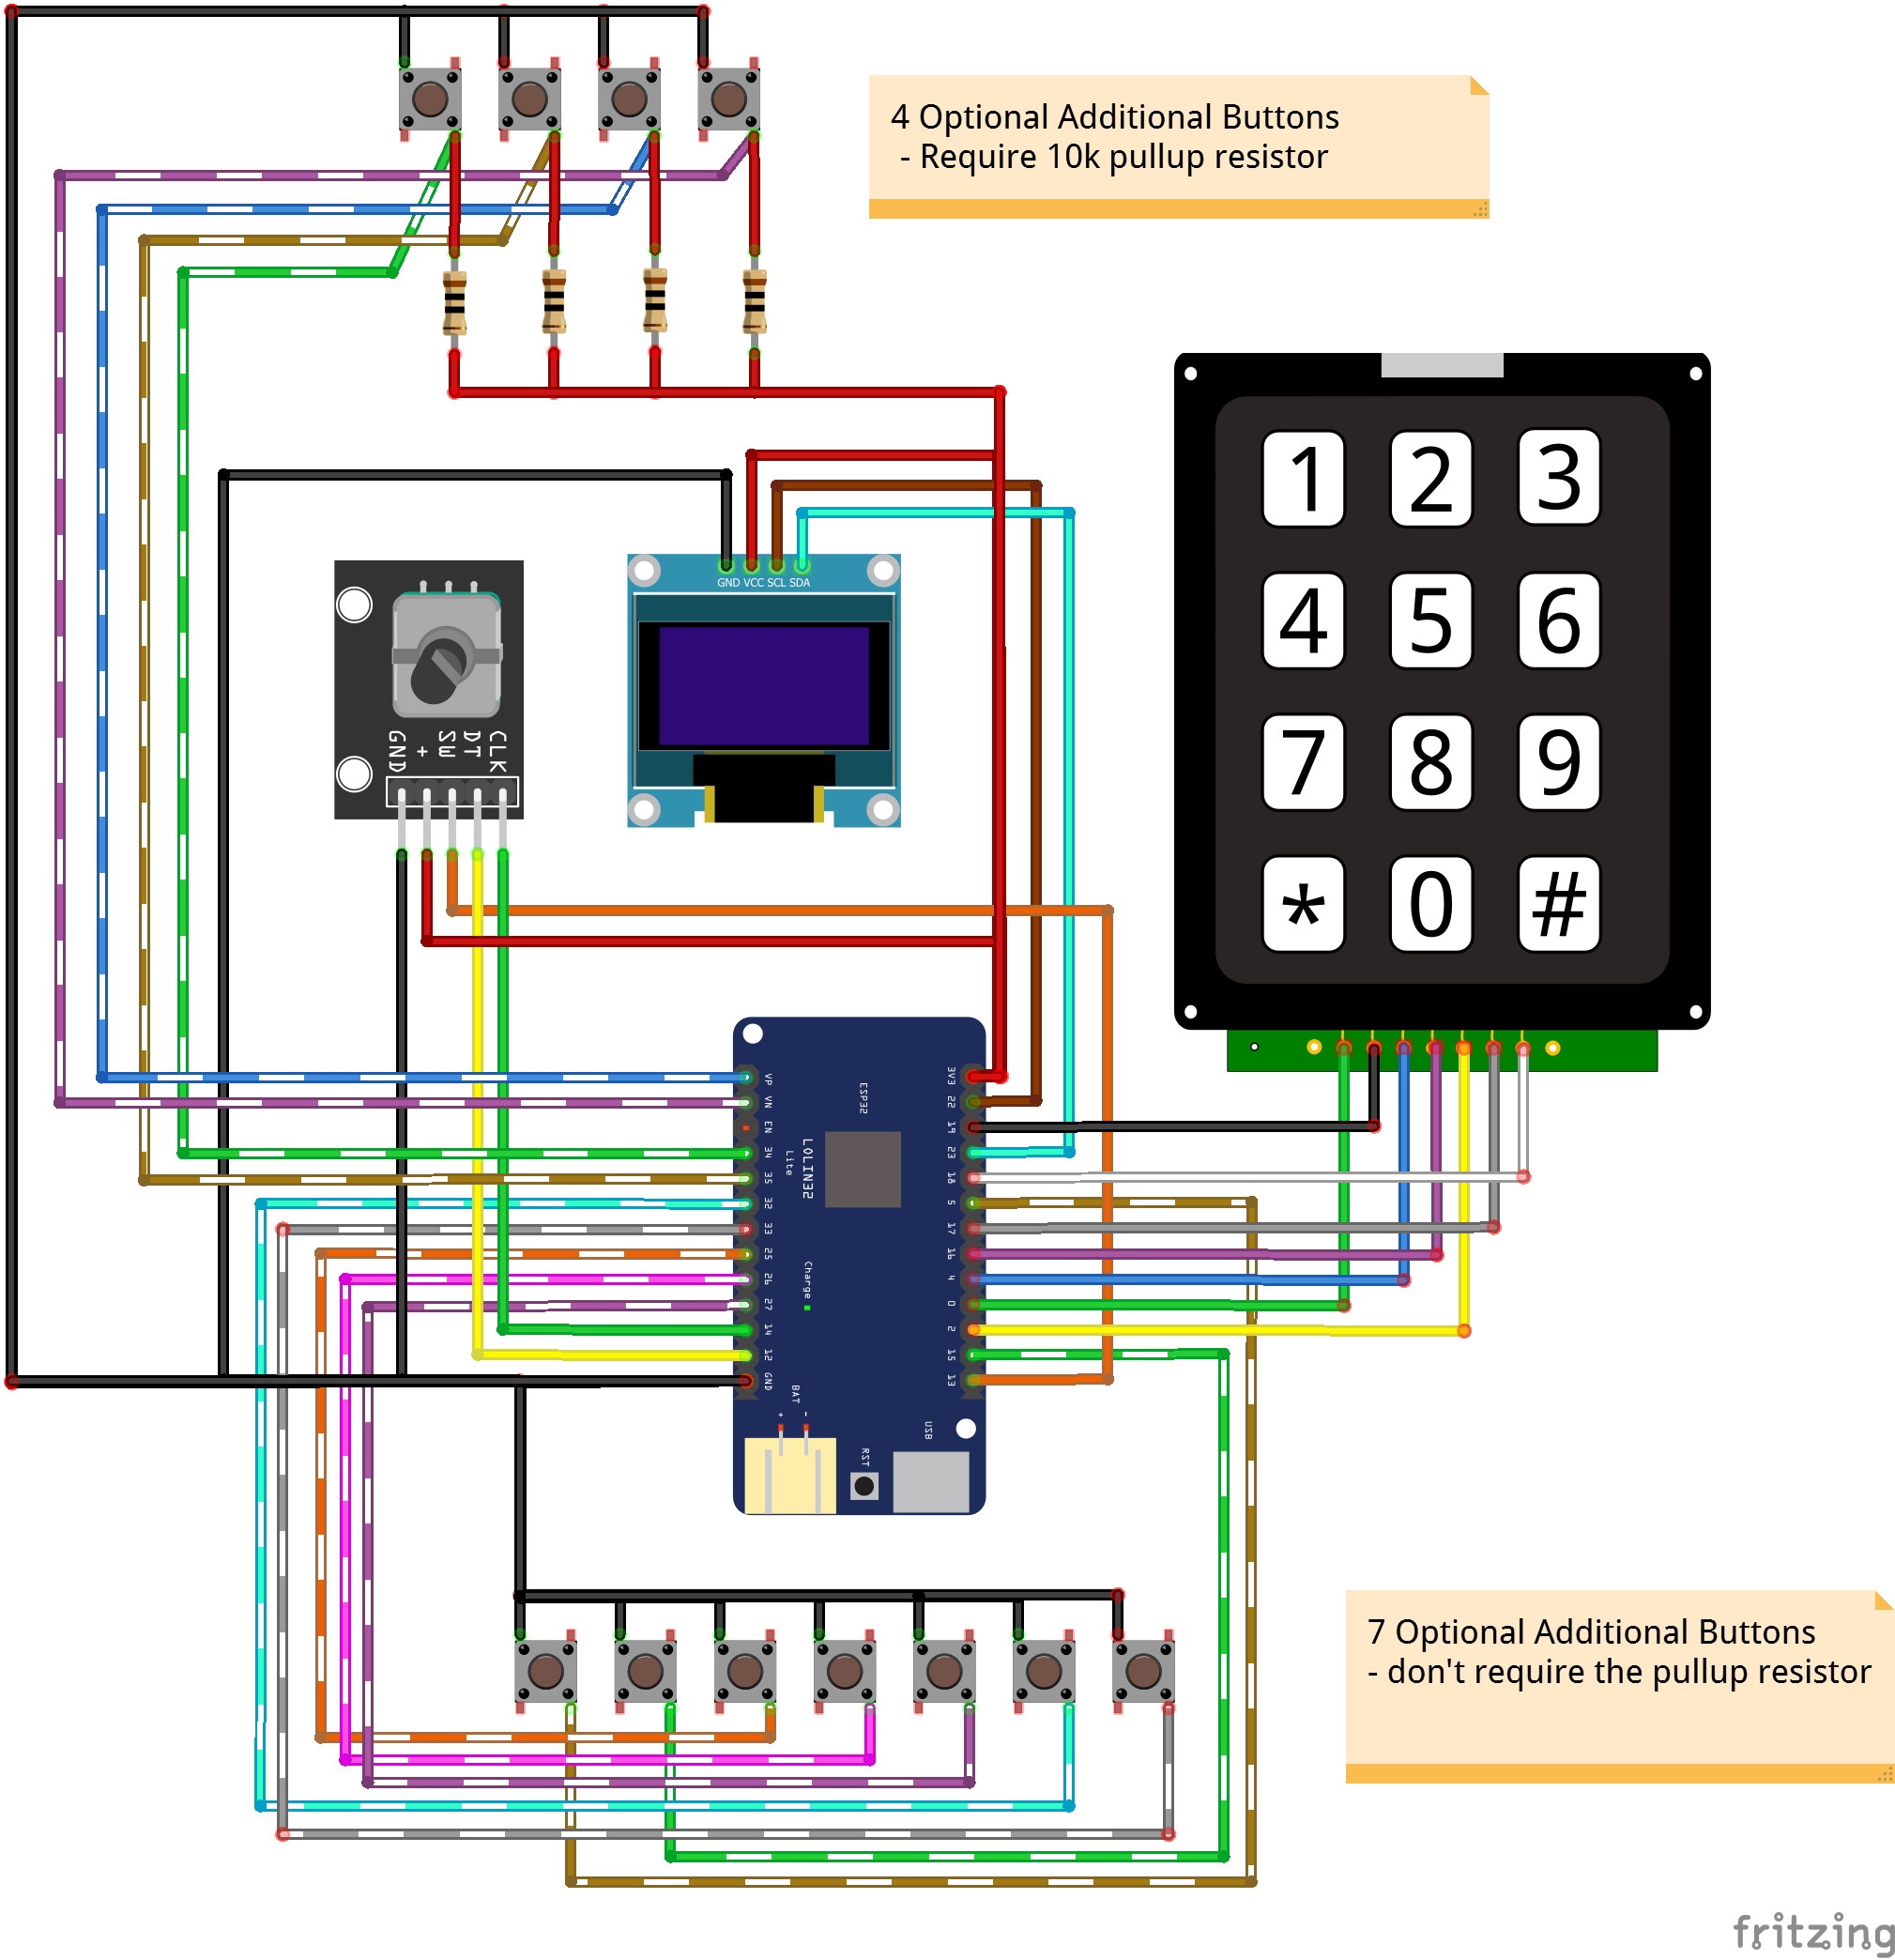
Pinouts for Optional 4x4 keypad and Additional Buttons - without pullup resistors
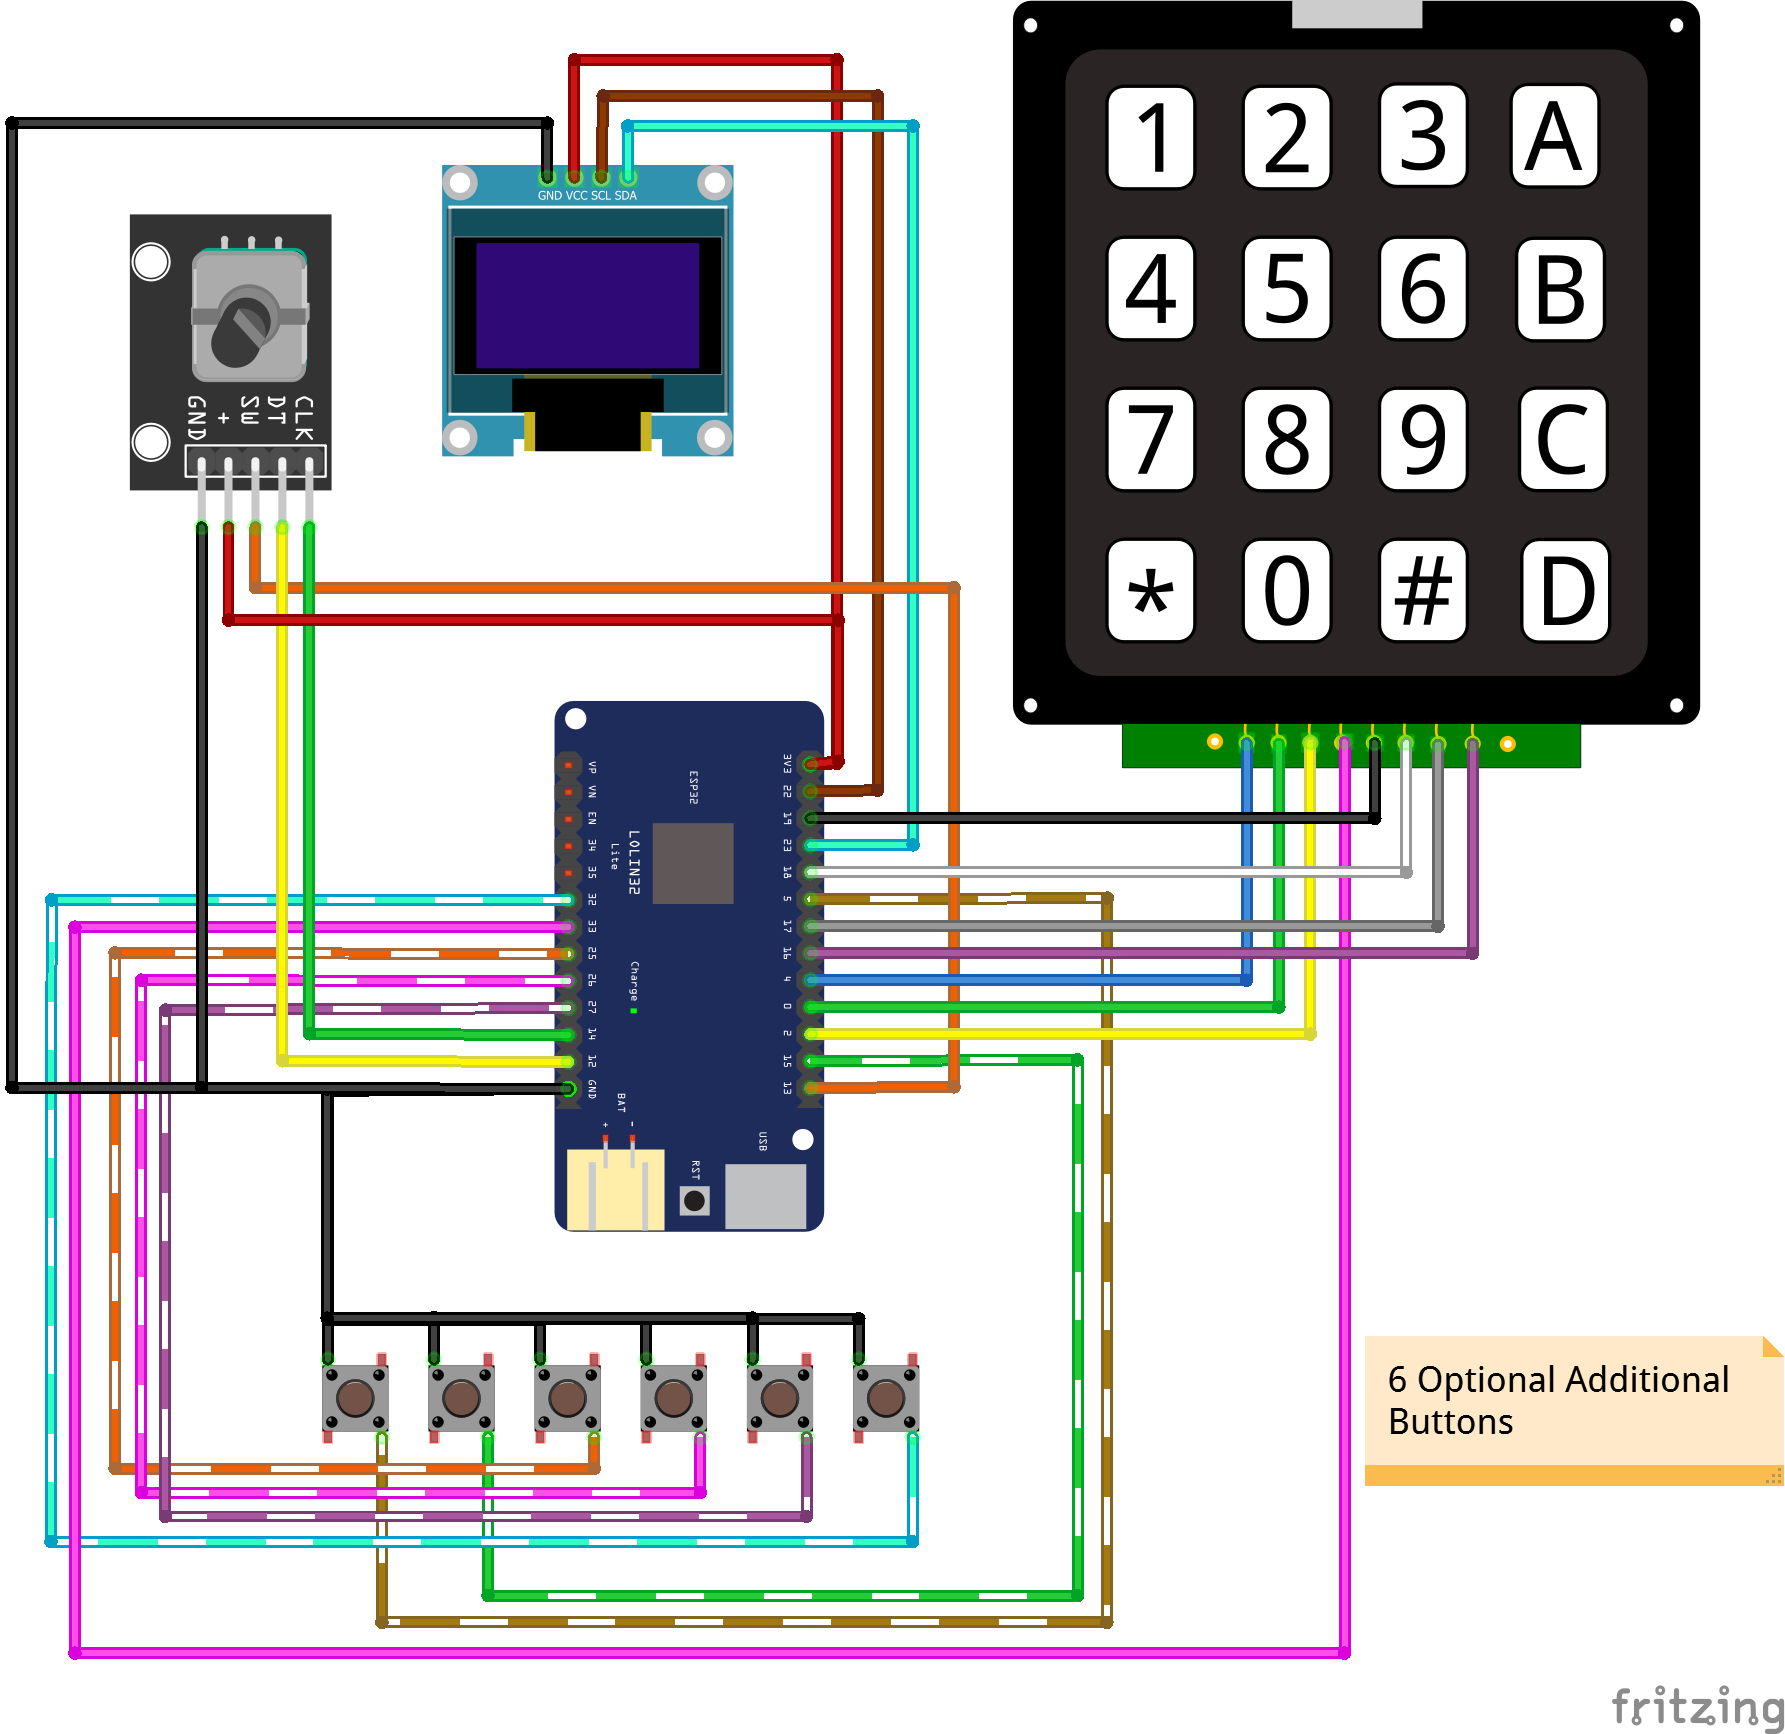
Pinouts for Optional Battery Monitor and Additional Buttons
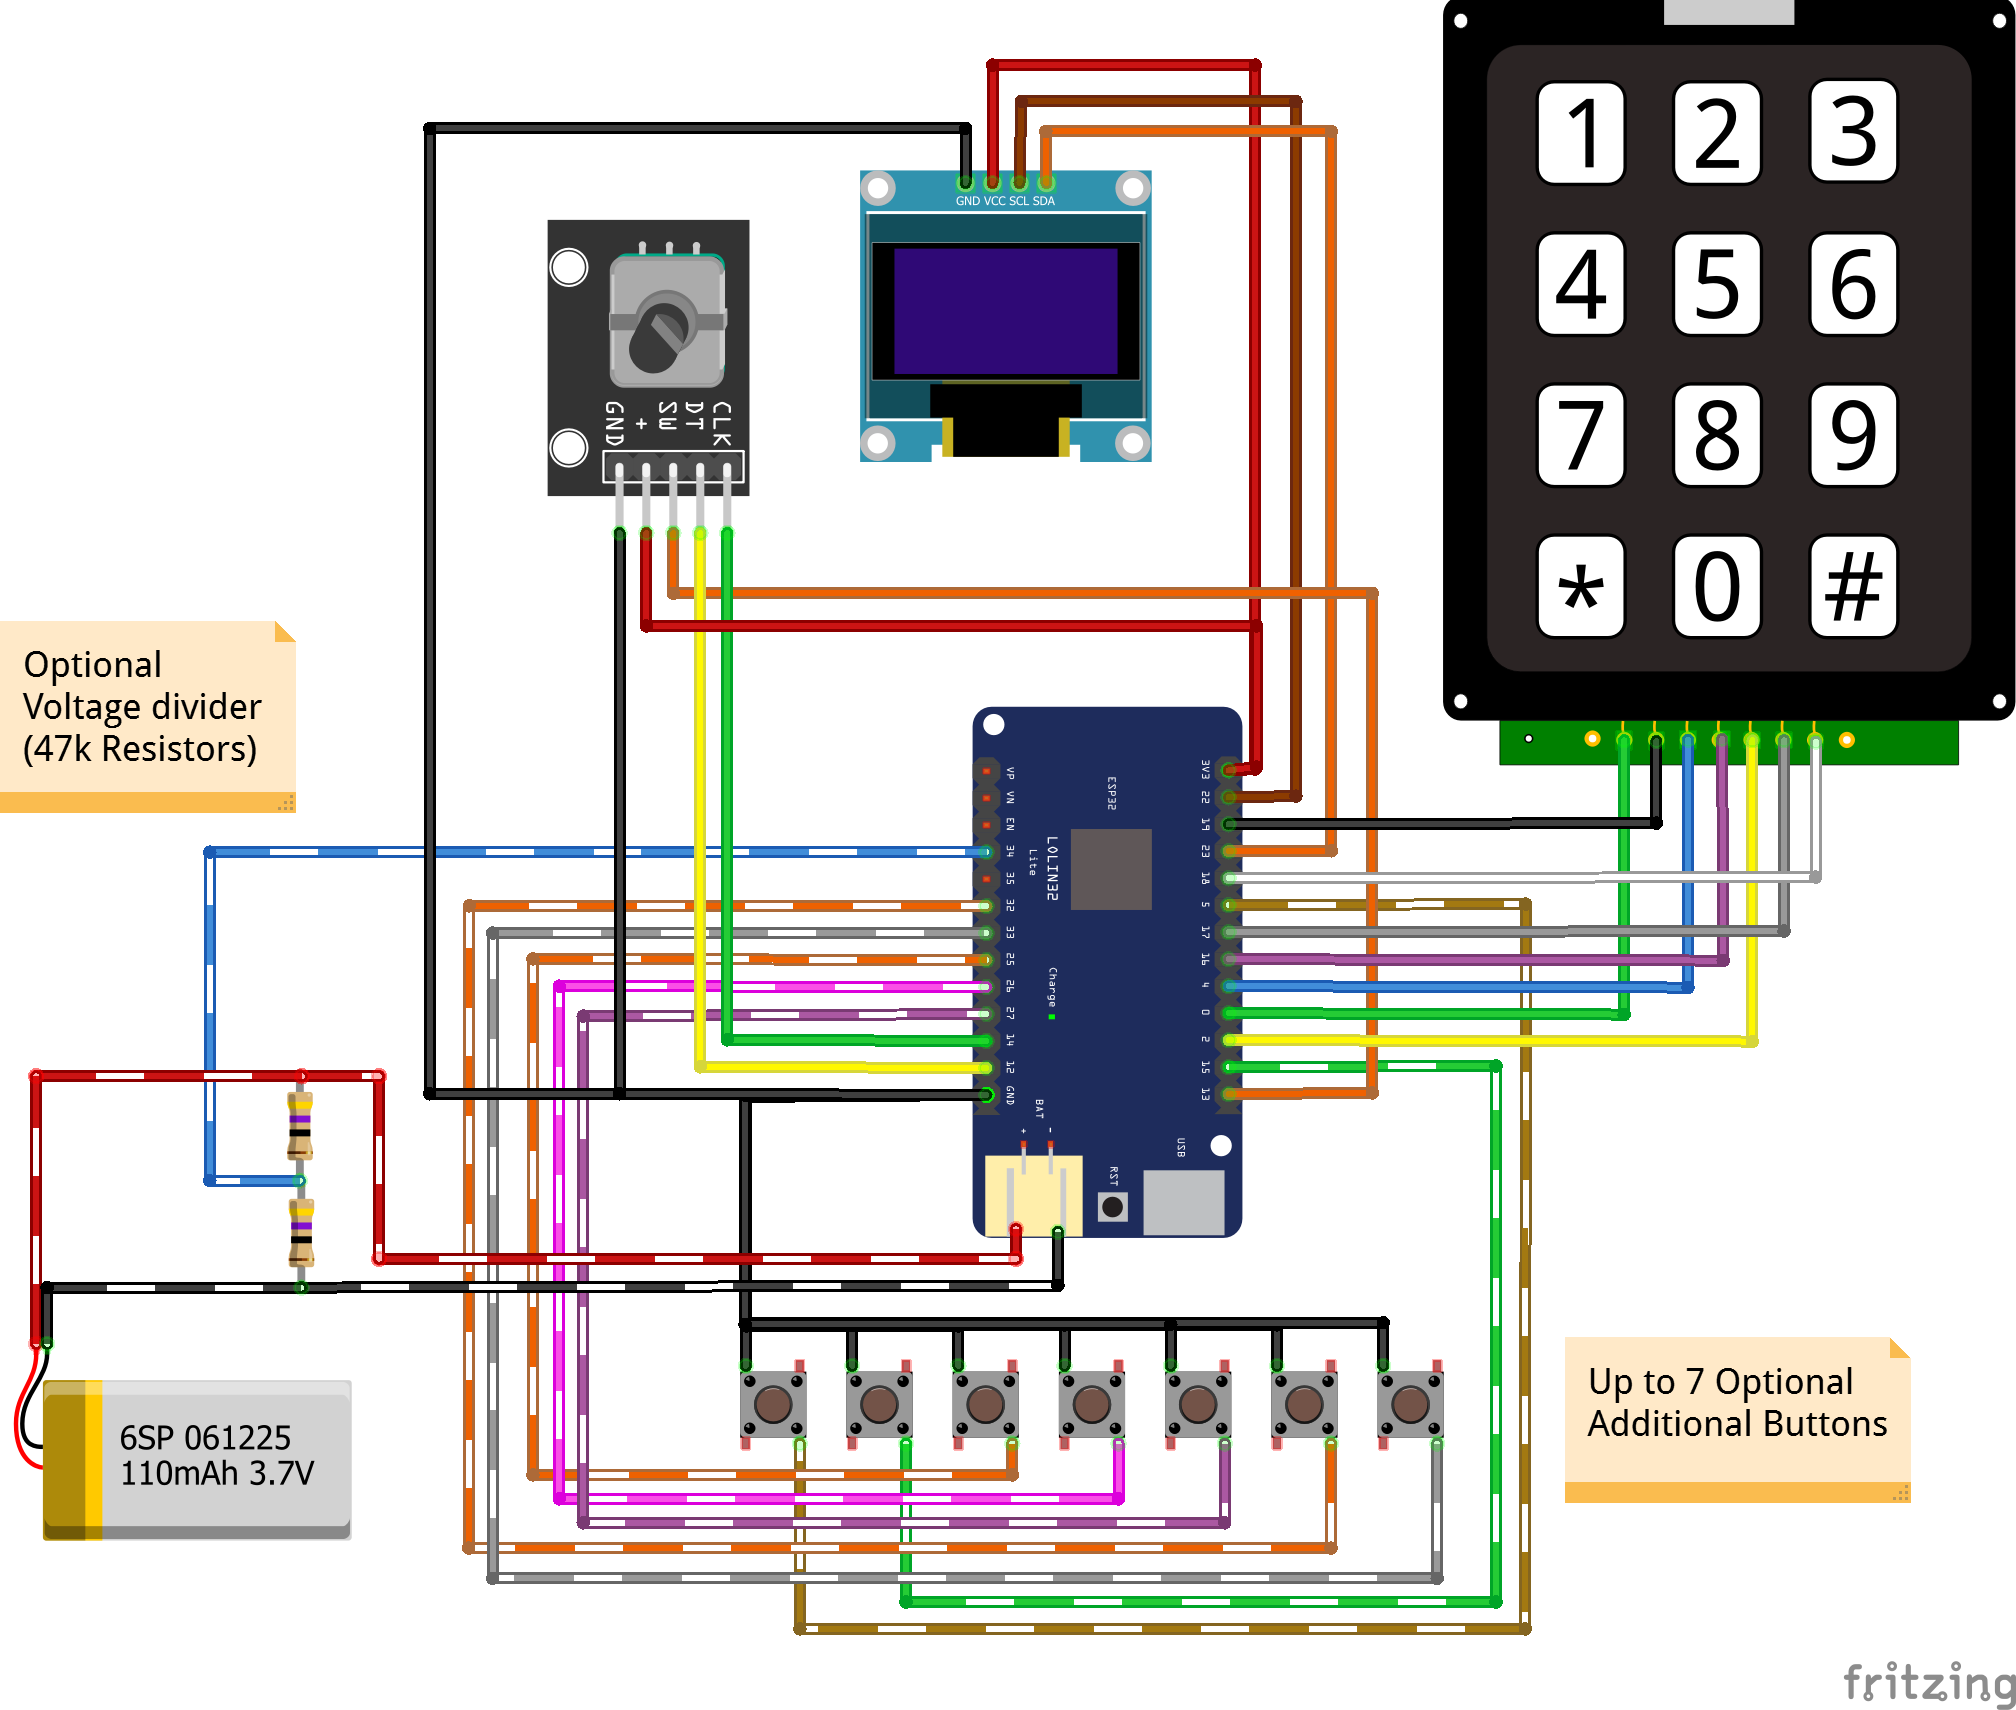
[!WARNING] Different keypad manufacturers may arrange the pins on the base of the keypad differently to the examples above.
See notes in the Default Pins for the keypads section below.
Default Pins
Default ESP32 and WiTcontroller pins
Click to expand to see a table of the default pinouts
``` 3x4 4x4 OLED Encoder Additional Battery Pin Keypad Keypad Buttons Test 0 C1 C1 N/A 1 2 C2 C2 N/A 3 4 C0 C0 5 AB0 N/A 6 N/A 7 N/A 8 N/A 9 N/A 10 N/A 11 12 DT 13 SW 14 CLK 15 AB1 16 R3 R3 17 R2 R2 18 R1 R1 19 R0 R0 N/A 20 N/A 21 22 SLC 23 SDA N/A 24 25 AB2 26 AB3 27 AB4 N/A 28 N/A 29 N/A 30 N/A 31 N/A 32 AB5 33 C3 AB6 34 AB7 * BT 35 AB8 * VP 36 AB9 * N/A 37 N/A 38 VN 39 AB10* * Requires an external pullup resistor ```Default Pins for the keypads
Click to expand to see a table of the Default Pins for the keypads
``` 3x4 Keypad - Left to Right 4x4 keypad - Left to Right C1 PIN 0 C0 PIN 4 R0 PIN 19 C1 PIN 0 C0 PIN 4 C2 PIN 2 R3 PIN 16 C3 PIN 33 C2 PIN 2 R0 PIN 19 R2 PIN 17 R1 PIN 18 R1 PIN 18 R2 PIN 17 R3 PIN 16 Cx = Column x Rx = Row x WARNING: Different keypad manufacturers may arrange the pins on the base of the keypad differently to those listed above. So it is important to make sure the pins on the keypad are correctly identified and adjusted as needed. ```Case
 </img>
  </img>
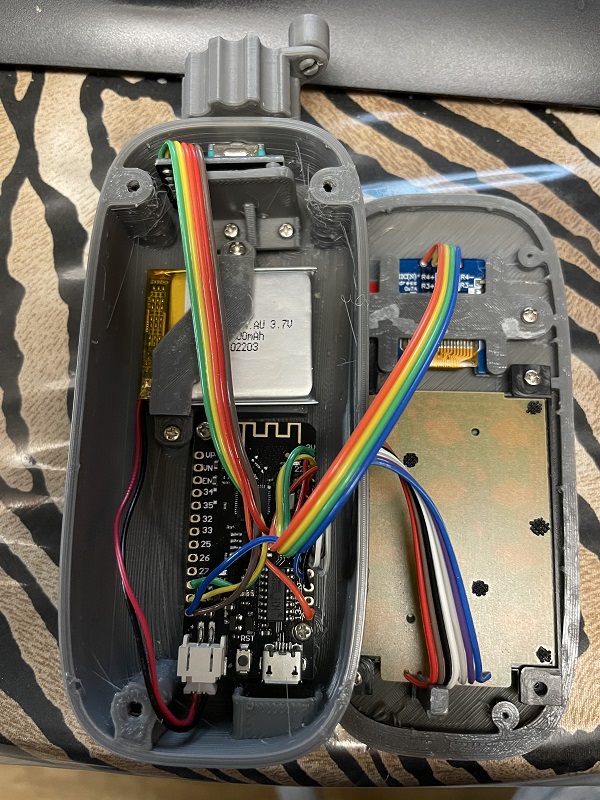
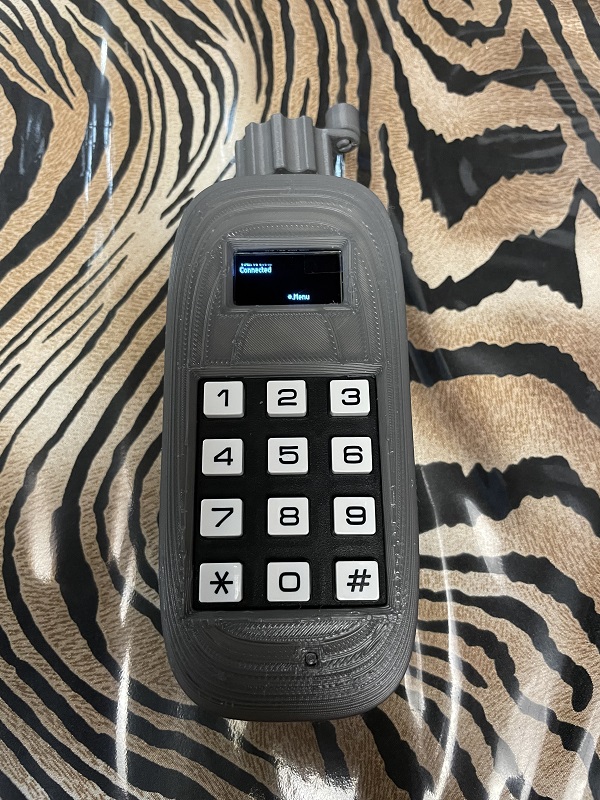
My case was 3D Printed for me by peteGSX (See the Thingiverse. )
- The 3x4 keypad petGSX designed the case for came from Jaycar and is slightly narrower than the one you see in the ‘deconstructed’ view in the video above.
- The case requires about a dozen M2x4mm screws
Variations
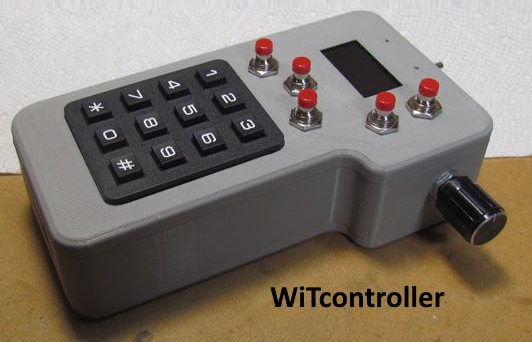 </img>
See sumner version.
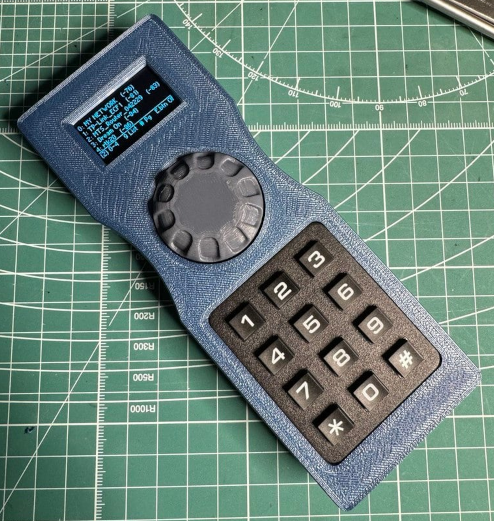 </img>
syurev version. See Thingiverse or cults3d
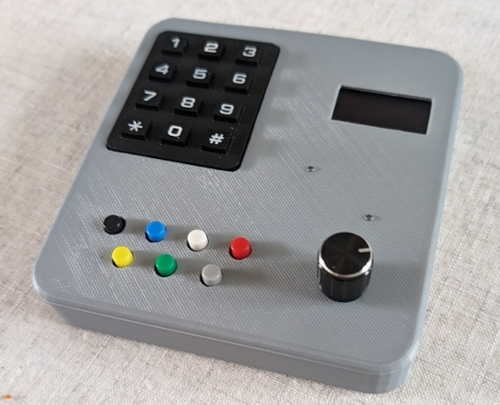 </img>
Railsnail version. See RMweb.
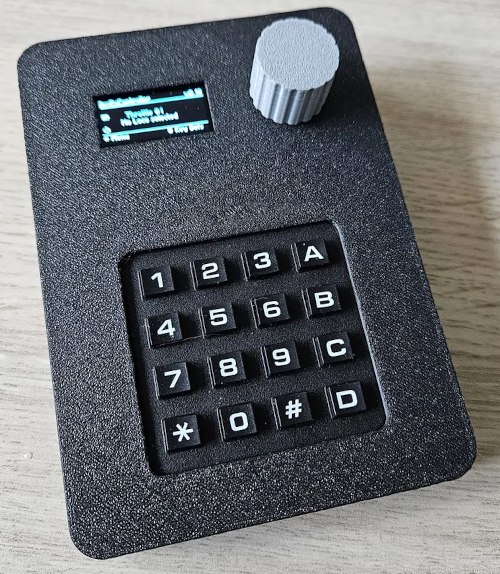 </img>
kees version. See printables.
 </img>
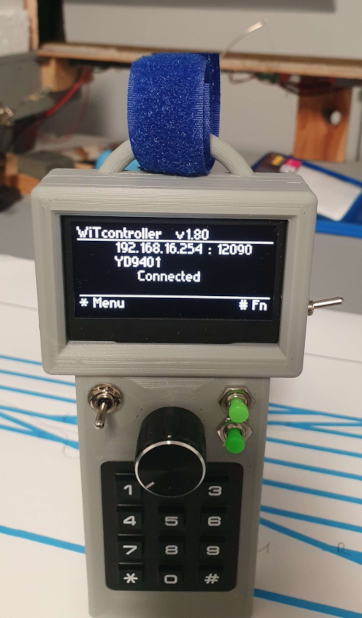
Unknown author. See Thingiverse.
 </img>
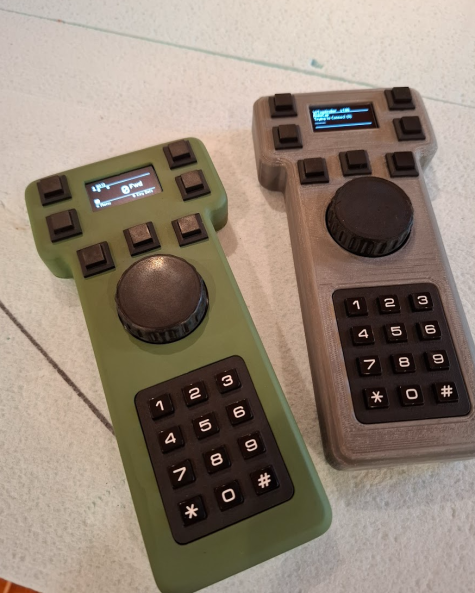
gingerangles version with 2.4 inch screen…
gingerangels can be contacted on the DCC-EX Discord server.
Discord Invite -
specific message
 </img>
rdbnogueira version. See Thingiverse
 </img>
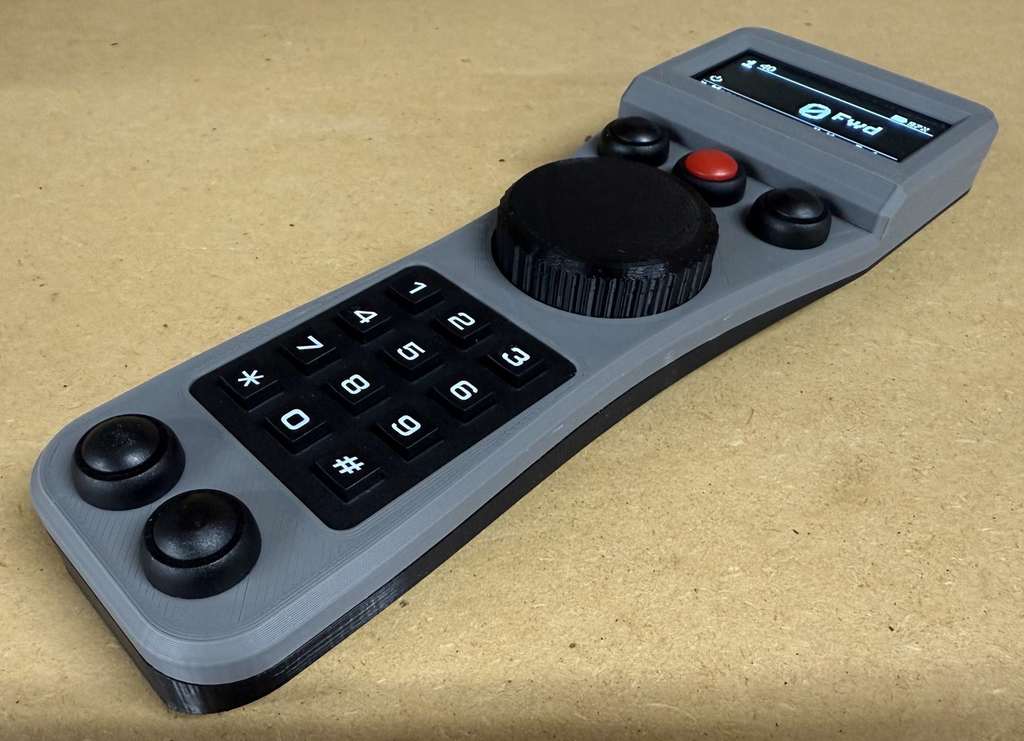
David Virgo’s version using the EC11 encoder. See GitHub
 </img>
markwtech version. See Thingiverse
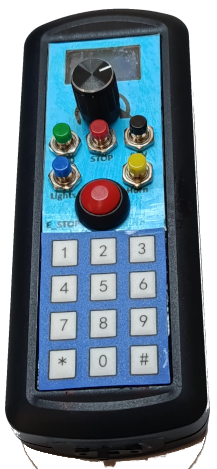 </img>
Michael Tagg version.
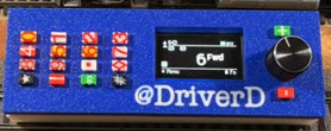 </img>
DriverD’s variation of the design. See YouTube
Some videos:
- https://youtu.be/RKnhfBCP_SQ
- https://www.youtube.com/shorts/1w7H2OvP8Jg
- https://www.youtube.com/watch?v=Ga_80A6LwCI (Full assembly video by DriverD)
- https://youtu.be/i4kLNncoFLA?si=bzF-ETGZtZM3IBoa (A variation by DriverD)
- https://www.youtube.com/watch?v=cClRS21x_cc&t=4s - A deconstructed view of a WiTcontroller in action
And for a very different take on what is possible by extending the design, have a look at: https://1fatgmc.com/RailRoad/DCC/HandCab-Index.html and at: https://1fatgmc.com/RailRoad/DCC/PhL%20Industries%20Cab%20Index.html
Loading the code
The instructions below are for using the Arduino IDE and GitHub Desktop.
Visual Studio Code (VSC) can be used instead of the Arduino IDE, and is actually my preferred IDE, but no instructions are included here. Contact me if you need assistance with VSC.
- Download the Arduino IDE.
- Available from https://support.arduino.cc/hc/en-us/articles/360019833020-Download-and-install-Arduino-IDE
- Download the esp32 boards in the Arduino IDE.
- Add the esp322 support with the following instructions: (See here for detailed instructions: https://randomnerdtutorials.com/installing-the-esp32-board-in-arduino-ide-windows-instructions/)
- In the Arduino IDE, go to File > Preferences
- Enter the following into the ‘Additional Board Manager URLs’ field: https://dl.espressif.com/dl/package_esp32_index.json
- Then Use the Boards Manager in the Arduino IDE to install the esp32 board support
- Tools > Board > Boards Manager
- Search for “esp32” by Expressive Systems. Install version 3.2.0 or later. Version 3.3.0 is recommended. (Later versions work, but go back to this 3.2.0 if you have problems.) (Eralier versions work, but 3.2.0 or later is required if you want to use 2.4gHz WiFi channels greater than 10. See notes below. )
- Add the esp322 support with the following instructions: (See here for detailed instructions: https://randomnerdtutorials.com/installing-the-esp32-board-in-arduino-ide-windows-instructions/)
- Download or clone this repository.
(Note: if you ‘clone’ initially, it is easier to receive updates to the code by doing a ‘fetch’ subsequently. See Notes below.)- Option - Clone - First Time Recommended
- Install GitHub Desktop from https://desktop.github.com/
- Create a free account on GitHub and authorise the app to allow it to connect top GitHub
- Select file -> Clone Repository - or ‘Clone an repository from the internet’ from the welcome page then select the ‘URL’ tab
- Enter https://github.com/flash62au/WiTcontroller as the URL
- Select a local folder to install it. The default folder for the Arduino usually looks like “…
\Documents\Arduino\". (This is a good but not essential place to put it.) - Click Clone
- Subsequently (Anytime after the first ‘clone’)
- click Fetch Origin and any changes to the code will be bought down to you PC, but your
config_buttons.handconfig_network.hwill not be touched.
- click Fetch Origin and any changes to the code will be bought down to you PC, but your
- Option - Download Not Recommended
- Open https://github.com/flash62au/WiTcontroller
- Click the green “Code” button and select download zip
- Extract the zip file to a local folder. The default folder for the Arduino usually looks like “…
\Documents\Arduino\". This is a good, but not essential, place to put it.
- Option - Clone - First Time Recommended
- Load the needed libraries to your PC.
These MUST BE loaded from the Library Manager in the Arduino IDE.- U8g2lib.h - Search for “U8g2”. Install version 2.35.30 or later.
(later versions should work, but go back to this 2.35.30 if you have problems.) - AiEsp32RotaryEncoder.h - search for “Ai Esp32 Rotary Encoder”. Install Version 1.6
- Keypad.h - Search for “Keypad” by Mark Stanley. Install version 3.1.1 or later.
(later versions should work, but go back to this 3.1.1 if you have problems.) -
WiThrottleProtocol.h - Search for “WiThrottleProtocol” (not “WiThrottle”). Install the latest version available.
(see version notes below for which versions of WiTcontroller require which versions of the library.)Note:
DO NOT download these libraries directly. Use the Library Manager.
DO NOT put them in the WiTcontroller folder.
- U8g2lib.h - Search for “U8g2”. Install version 2.35.30 or later.
- These should have been automatically installed when you downloaded the esp32 boards.
YOU SHOULD NOT NEED TO DO ANYTHING SPECIFIC TO GET THESE- WiFi.h - https://github.com/espressif/arduino-esp32/tree/master/libraries/WiFi
- ESPmDNS.h - https://github.com/espressif/arduino-esp32/blob/master/libraries/ESPmDNS
-
Preferences.h
Notes:
DO NOT download these libraries directly. Use the Boards Manager.
DO NOT put them in the WiTcontroller folder.
These libraries do not appear in your list of libraries, but will be available to use regardless. (The files are actually buried away in a subfolder of the ESP32 Boards library.)
- Copy and rename the two example config files.
You will need to use a File Manger type of app on the PC to do this.- Copy
config_network_example.hto a new fileconfig_network.h -
Copy
config_buttons_example.hto a new fileconfig_buttons.hAlternately, you can use the experimental button configuration generator page to create the
config_buttons.hfor you. And the experimental network configuration generator page to create theconfig_network.hfor you.Note:
These new files are not included in the download, so that you can personalise your configuration without fear that your configurations will be overridden if you update (download again) the WiTcontoller code.
- Copy
-
Open the Arduino IDE and THEN find and open the
WiTcontoller.inofile.Note:
If you open the file from the IDE, rather then opening it from a File Manager, will automatically open all the files in the WiTcontroller folder in the IDE.Whereas, if you open it from a File manger app (by double clicking on it) only the file you selected will open.
- Edit your personal
config_network.hfile.- Edit it to include the network SSIDs you want to use. (Not essential, but entering passwords via the encoder is tedious.)
- Edit your personal
config_buttons.hfile.- Optionally, edit this to change the mapping of the keypad buttons to specific functions.
- Optionally, edit this to configure the additional buttons (if you have included them) to specific functions.
- Optionally, edit this to change if you want the function buttons to display when you press #, instead of the default of showing the Key Definitions
- Optionally, change the language/localisation.
See the Languages / localisation section below.
- Upload the sketch.
- Select the board type as
WEMOS LOLIN32 Litein the Arduino IDE. - Connect the board via USB and select the appropriate port in the Arduino IDE.
- Click
Upload–>
- Select the board type as
Version Notes
Click to expand
* WiTcontroller version 1.83 includes a new way to add additional buttons. (see below) The old way will continue to work, but conversion to the new format is recommended.This change allows up to a total of 11 additional buttons, but some of the extra pins may be in use for the 4x4 keypad, the battery test, etc. * WiTcontroller version 1.82 or later requires WiThrottleProtocol version 1.1.26 or later. * WiTcontroller version 1.73 or later is recommended to use WiThrottleProtocol version 1.1.25 or later to address a bug in heartbeat send, but only seen with JMRI WiThrottle . * WiTcontroller version 1.66 or later requires WiThrottleProtocol version 1.1.24 or later. * WiTcontroller version 1.65 or later requires WiThrottleProtocol version 1.1.23 or later. * WiTcontroller version 1.57 or later requires WiThrottleProtocol version 1.1.20 or later for the E_STOP and E_STOP_CURRENT_LOCO to work correctly. * WiTcontroller version 1.45 or later requires WiThrottleProtocol version 1.1.14 or later. * WiTcontroller version 1.41 or later requires WiThrottleProtocol version 1.1.12 or later. * WiTcontroller version 1.39 or later requires WiThrottleProtocol version 1.1.11 or later. * WiTcontroller version 1.38 or later requires WiThrottleProtocol version 1.1.10 or later. * WiTcontroller version 1.35 or later requires WiThrottleProtocol version 1.1.7 or later. * WiTcontroller version 1.33 or later requires WiThrottleProtocol version 1.1.6 or later. * WiTcontroller version 1.19 - 1.32 requires WiThrottleProtocol version 1.1.3 - 1.1.5 or later. * WiTcontroller version 1.06 or later requires WiThrottleProtocol version 1.1.2 or later. * WiTcontroller version 1.01 or later requires WiThrottleProtocol version 1.1.0 or later. * WiTcontroller version 0.10 or later requires WiThrottleProtocol version 1.0.3 or later. * The *WiFi.h* and *ESPmDNS.h* libraries were automatically installed for me when I installed the esp32 boards, however it is possible that you may need to install them manually, but this is seriously not recommended. * Later versions of the ESP board support are available and do appear to work, but if you have difficulties version 2.0.11 and 1.0.6 appear to be stable. * Later versions of the libraries generally should work, but if you have difficulties use the versions listed above. * To get the WiTcontroller sketch I recommend using either the git command line, or the far more friendly 'GitHub Desktop' app. See instructions above. * If you receive and error related to Python, and you are on MacOS 12 and above please edit the platform file, change from python to python3 as follows; preferences->user/path/arduino/packages/hardware/esp32/version/platform.txt and edit the line that looks as follows:tools.gen_esp32part.cmd=python3 "{runtime.platform.path}/tools/gen_esp32part.py"
Using WiTcontroller
Be aware of…
WiFi limitations
The ESP32 cannot use the 5gHz frequencies. It is limited to the 2.4gHz frequencies.
Using 2.4gHz Wifi channels beyond 10 (11-13) is problematic. I have added an experimental set of definitions in config_network_example.h that allow you to set the country code. In theory this will allow the use of the additional channels, but requires the use the version 3.2.0 (or later) of the ESP32 board library. This has had only minimal testing.
Definitions and Explanations
WiTcontroller is deliberately described as a “controller” not a “throttle”.
A “Throttle” can control only one train, which may be one loco, or more than one loco in consist/MU.
WiTcontroller, as a “controller”, contains up to six (6) “throttles”. Each of which can control any number of locos in consist/MU. You can swap between throttles at will (keypad 5) to select which locos/consists/MUs you are manipulating at any given time. While you can only manipulate one loco/consist/MU at a time, the others continue running at the setting you last gave them.
Features
Currently functioning:
WiTcontroller:
- Provides a list of discovered SSIDs with the ability to choose one. When you select one:
- If it is one in your specified list (in the sketch), it will use that specified password
-
If it is a DCC-EX EX-CommandStation in Access Point (AP) mode, it will try to guess the password.
Warning! prior to version 1.108 WiTcontroller assumes that it will be the default password for EX-CommandStations. If you have changed the password it will fail to connect unless you have the SSID and correct password listed in
config_network.h.From version 1.108 it will try to connect to a DCC-EX EX-CommandStation with the ‘guessed’ password on the first attempt. Then, if it fails to connect, it will ask for the password on the second attempt.
Note that it will only try to guess the EX-CommandStation password if the SSID name is in the default form of “DCCEX_xxxxxx”. Where xxxxxx is part of the MAC address of the device.
-
Otherwise it will ask to enter the password (Use the rotary encoder to choose each character and the encoder button to select it.
*= backspace.#= enter the password.)Any/all passwords entered this way will be stored in non-volatile memory and will be retrieved on the next attempt to connect, then WiTcontroller will allow you to edit or confirm it
- Optionally provides a list of SSIDs with the specified passwords (in the sketch) to choose from
- Auto-connects to the first found WiThrottle Protocol Server if only one found, otherwise:
- Asks which server to connect to
- If none found will ask to enter the IP Address and Port
-
Guesses the WiThrottle IP address and Port for DCC-EX EX-CommandStations in Access Point (AP) mode
From version 1.111 it ‘guesses’ that there will be a server on 192.168.4.1:2650 if the SSID name contains “DCCEX” or “DCC-EX”. (Prior version 1.111 it would only guess if the SSID name was in the default form of “DCCEX_xxxxxx”.)
- Optionally you can add a #define (a preference) to disable this auto connect feature
- Allows On-the-fly consists/MUs
Allows assigning commands directly to the 1-9 buttons (in the sketch) (see list below)
- This is done in
config_button.h - Latching / non-latching for the function is provided by the roster entry of the WiThrottle server
- This is done in
- Optionally uses a potentiometer (pot) instead of the rotary encoder
- Optional ability to assign commands directly to the 1-11 additional buttons (in the sketch) (see list below)
- These are defined
config_button.h
- These are defined
- Provides a command Menu (see below for full list) including:
- Able to select and deselect locos:
- by their DCC address, via the keypad
- On NCE systems, a leading zero (0) will force a long address
- From the first 50 locos in the roster (can be increased)
- by their DCC address, via the keypad
- Able to select multiple locos to create a consist
- Able to change the facing of the additional locos in the consists/MUs (via the ‘extra’ menu after selection)
- Able to activate any function (0-31)
- Showing of the roster function labels (from the WiThrottle server if provided)
- Quick access to the functions by pressing
#. Temporarily enabled via the Extras menu (or permanently enabled inconfig_button.h) - Limited ability to configure which functions are sent to the first or all locos in a consist (defined in
config_button.h)
- Able to throw/close turnouts/points:
- from the address
- from the first 50 turnouts/points in the server list
- Able to activate routes:
- from their address
- from the first 50 routes in the server list
- Set/unset a multiplier for the rotary encoder
- Power Track On/Off
- Disconnect / Reconnect
- Put ESP32 in deep sleep and restart it
- Option to switch between Single Loco and Consist/MU (Drop before Acquire)
- Option to save the currently select locos (on multiple throttles) and have them automatically re-acquired on next connection.
- Option to disable the heartbeat check
- Able to select and deselect locos:
- Option to have up to 6 command sequences executed on connection
- Option to automatically acquire a loco if there is only one loco in the roster
-
Have up to 6 throttles, each with an unlimited number of locos in consist.
The default is 2 throttles, which can be increased or decreased temporarily via the Extras menu (or permanently enabled in
config_button.h) - Limited dealing with unexpected disconnects. It will throw you back to the WiThrottle Server selection screen.
-
The boundary between short and long DCC addresses can be configured in ``config_buttons.h`.
The default is that 127 and below are Short Addresses.
- The default speed step (per encoder click) can be configured in
config_buttons.h - The controller will automatically shut down if no SSID is selected or entered in 4 minutes (to conserve the battery)
- Relatively easy to add/use translation files.
- Translations files for German, Italian Dutch and Chinese are included.
ToDo:
- Speed button repeat (i.e. hold the keypad button down)
- Deal with unexpected disconnects better
- automatic attempt to reconnect
- Keep a list of IP addresses and ports if mDNS doesn’t provide any
- Additional translation files
Command menu
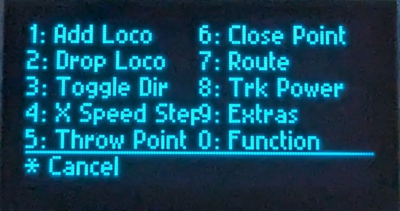
- 0-9 keys = pressing these directly will do whatever has been configured in your
config_buttons.hfor them to do, or whatever is the default for that key (see # below) - * = Menu: The button press following the * is the actual command:
- 1 = Add loco.
- Followed by the loco number, followed by # to complete. e.g. to elect loco 99 you would press ‘*199#’
- or # alone to show the roster # again will show the next page
- 2 = release loco:
- Followed by the loco number, followed by # to release an individual loco. e.g. to deselect the loco 99 you would press ‘*299#’
- Otherwise followed directly by # to release all e.g. ‘*2#’
- 3 = Toggle direction.
- 4 = Set / Unset a 2 times multiplier for the rotary encoder dial.
- 5 = Throw turnout/point.
- Followed by the turnout/point number, followed by the # to complete. e.g. Throw turnout XX12 ‘*512#’ (where XX is a prefix defined in the sketch)
- or # alone to show the list from the server # again will show the next page
- 6 = Close turnout.
- Followed by the turnout/point number, followed by # to complete. e.g. Close turnout XX12 ‘*612#’ (where XX is a prefix defined in the sketch)
- or # alone to show the list from the server
- 7 = Set Route.
- Followed by the Route number, followed by # to complete. e.g. to Set route XX:XX:0012 ‘*60012#’ (where 'XX:XX:' is a prefix defined in the sketch)
- or # alone to show the list from the server # again will show the next page
- 8 = Track Power On/Off.
- 9 = Extras. Followed by…
- 0 then # to toggle the action the the # key does as a direct action, either to show the direct action key definitions, or the Function labels.
- 1 to change the facing of locos in a consist.
- 3 to toggle the heartbeat check.
- 4 to increase the number of available throttle (up to 6)
- 5 to decrease the number of available throttle (down to 1)
- 6 to Disconnect/Reconnect.
- 7 to put into deep sleep
- 8 Toggle between Single loco and Consist/MU (Drop before Acquire)
- 9 Save the Currently selected locos so they will be automatically acquired on reconnection
- 0 then # to toggle the action the the # key does as a direct action, either to show the direct action key definitions, or the Function labels.
- 0 = Function button. Followed by…
- the function number, Followed by # to complete. e.g. to set function 17 you would press ‘*017#’
- # alone, to show the list of functions. Pressing ‘*’ again before the ‘#’ will terminate the current command (but not start a new command)
- 1 = Add loco.
- # = Pressing # alone will show the actions the numbered keys (0-9) perform, outside the menu. Optionally, you can configure it so that it shows the Function labels from the roster
Pressing the Encoder button while the ESP32 is in Deep Sleep will revive it.
Screens
WiFI/SSID Connection Screens
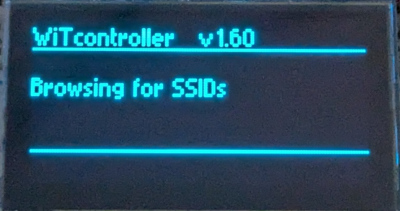
Start-up - browsing for SSIDs
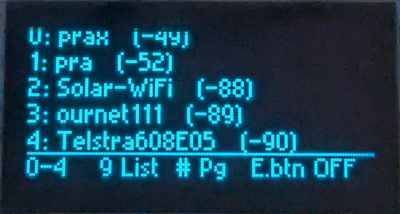
SSID (WiFi networks) list
Trying to to connect to SSID
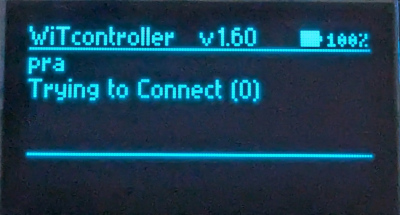
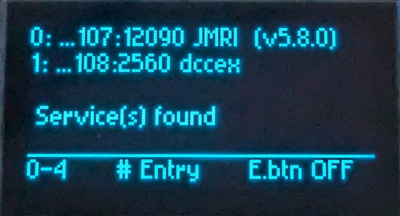
WiThrottle Server Connection Screens
WiThrottle Server List
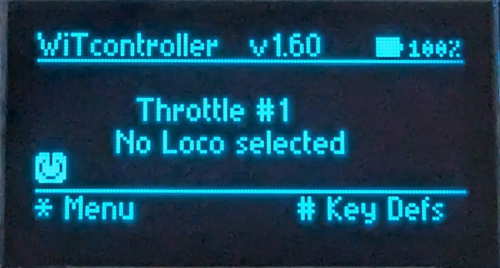
Throttle Screen
Throttle Screen with no loco acquired
Throttle Screen - with locos selected on throttle 1 and throttle 2
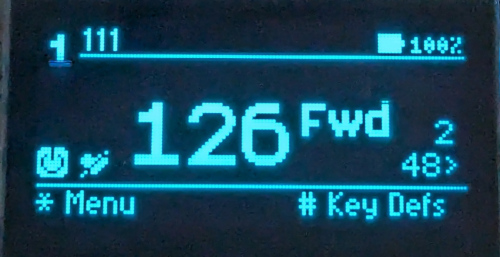
TT LLLL LLLL LLLL               BBBBB
TT ----------------------------------
f f f f f f f f f f f f f f f f f f f
              SSSSS  DDDD
              SSSSS  DDDD
G             SSSSS
M             SSSSS              llll
P  h                          d sss d
-------------------------------------
mmmmmmmmm
- TT = Current Throttle Number
- LLLL = Currently acquire loco(s) on this throttle
- SSSS = Speed of current throttle (0-126)
- DDDD = Direction of current throttle (Fwd,Rev)
- f = State of each of the 32 functions (number displays if the function is active)
- llll = First Loco on next available throttle
- d = Direction of next next available throttle (<,>)
- sss = Speed of next available throttle (0-126)
- h = heartbeat (only displays if heartbeat is disabled)
- M = Speed step multiplier
- P = Track Power
- G = Guest Mode / Child Lock Active
- BBBB = Optional battery state
- mmmm = menu, other instructions or broadcast messages
* Menu
# Direct Commands List
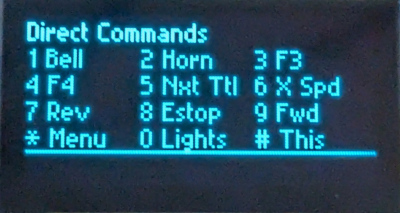
Default number key assignments (0-9) (outside the menu)
- 0 = FUNCTION_0 (DCC Lights)
- 1 = FUNCTION_1 (DCC Bell)
- 2 = FUNCTION_3 (DCC Horn/Whistle)
- 3 = FUNCTION_3
- 4 = FUNCTION_4
- 5 = NEXT_THROTLE
- 6 = SPEED_MULTIPLIER
- 7 = DIRECTION_REVERSE
- 8 = SPEED_STOP
- 9 = DIRECTION_FORWARD
Allowed assignments for the 0-9 keys and/or Additional Buttons
Note: you need to edit config_buttons.h to alter these assignments (copy config_buttons_example.h)
- FUNCTION_NULL - don’t do anything
- FUNCTION_0 - FUNCTION_31
- SPEED_STOP
- SPEED_UP
- SPEED_DOWN
- SPEED_UP_FAST
- SPEED_DOWN_FAST
- SPEED_MULTIPLIER
- E_STOP - E Stop all locos on all throttles
- E_STOP_CURRENT_LOCO - E Stop locos on current throttle only
- POWER_TOGGLE
- POWER_ON
- POWER_OFF
- SHOW_HIDE_BATTERY
- DIRECTION_TOGGLE
- DIRECTION_FORWARD
- DIRECTION_REVERSE
- NEXT_THROTTLE
- SPEED_STOP_THEN_TOGGLE_DIRECTION - stops the loco if moving. Toggles the direction if stationary.
- MAX_THROTTLE_INCREASE - change the number of available throttles on-the-fly
- MAX_THROTTLE_DECREASE - change the number of available throttles on-the-fly
- POWER_TOGGLE - track power toggle
- POWER_ON - track power on
- POWER_OFF - track power off
- THROTTLE_1 - change to a specific throttle
- THROTTLE_2 - change to a specific throttle
- THROTTLE_3 - change to a specific throttle
- THROTTLE_4 - change to a specific throttle
- THROTTLE_5 - change to a specific throttle
- THROTTLE_6 - change to a specific throttle
- SLEEP - put device to sleep
- CUSTOM_1 - There must be already be a command defined as
#CUSTOM_COMMAND_1 ... - CUSTOM_2 - There must be already be a command defined as
#CUSTOM_COMMAND_2 ... - CUSTOM_3 - There must be already be a command defined as
#CUSTOM_COMMAND_3 ... - CUSTOM_4 - There must be already be a command defined as
#CUSTOM_COMMAND_4 ... - CUSTOM_5 - There must be already be a command defined as
#CUSTOM_COMMAND_5 ... - CUSTOM_6 - There must be already be a command defined as
#CUSTOM_COMMAND_6 ... - CUSTOM_7 - There must be already be a command defined as
#CUSTOM_COMMAND_7 ... - CUSTOM_8 - There must be already be a command defined as
#CUSTOM_COMMAND_8 ... - CUSTOM_9 - There must be already be a command defined as
#CUSTOM_COMMAND_9 ... - CUSTOM_10 - There must be already be a command defined as
#CUSTOM_COMMAND_10 ... - CUSTOM_10 - There must be already be a command defined as
#CUSTOM_COMMAND_11 ... - HORN_OR_WHISTLE_SEARCH
- HORN_SEARCH
- WHISTLE_SEARCH
- BRAKE_SEARCH
- additional custom searches (see below)
- CUSTOM_MENU_SELECT_1 - There must be already be a command defined as
#CUSTOM_MENU_SELECT_COMMAND_1 ... - CUSTOM_MENU_SELECT_2 - There must be already be a command defined as
#CUSTOM_MENU_SELECT_COMMAND_2 ... - CUSTOM_MENU_SELECT_3 - There must be already be a command defined as
#CUSTOM_MENU_SELECT_COMMAND_3 ... - CUSTOM_MENU_SELECT_4 - There must be already be a command defined as
#CUSTOM_MENU_SELECT_COMMAND_4 ... - CUSTOM_MENU_SELECT_5 - There must be already be a command defined as
#CUSTOM_MENU_SELECT_COMMAND_5 ... - CUSTOM_MENU_SELECT_6 - There must be already be a command defined as
#CUSTOM_MENU_SELECT_COMMAND_6 ... - CUSTOM_MENU_SELECT_7 - There must be already be a command defined as
#CUSTOM_MENU_SELECT_COMMAND_7 ... - CUSTOM_MENU_SELECT_8 - There must be already be a command defined as
#CUSTOM_MENU_SELECT_COMMAND_8 ... - CUSTOM_MENU_SELECT_9 - There must be already be a command defined as
#CUSTOM_MENU_SELECT_COMMAND_9 ... - CUSTOM_MENU_SELECT_10 - There must be already be a command defined as
#CUSTOM_MENU_SELECT_COMMAND_10 ... - CUSTOM_MENU_SELECT_10 - There must be already be a command defined as
#CUSTOM_MENU_SELECT_COMMAND_11 ...
Options and Extras
Rotary Encoder ‘sensitivity’
If you find that moving the encoder very slightly flicks the speed or the selected option back and forward, try adjusting this define by uncommenting (removing the //) following line in your config_buttons.h and changing the value. (Decrease the value to make it less sensitive. Increase the value to make it more.)
#define ENCODER_SENSITIVITY 85
Depending on your encoder - generally try between 80 and 100 till you get expected behaviour. The default is 85. (Prior to version 1.109 the it was hard coded to 100.)
Rotary Encoder ‘bounce’
If you find that moving the encoder a single click sends more than one speed command, try adjusting this define by uncommenting (removing the //) following line in your config_buttons.h and changing the value. (Usually you need to increase the value.)
#define ROTARY_ENCODER_STEPS 2
Depending on your encoder - try 1,2,3 or 4 till you get expected behaviour. The default is 2
Direction of rotation of the encoder
The default configuration is to rotate the encoder counter-clockwise to increase speed. This made sense for the original simple case where the knob is on the top end of the case, but is not for many of the new cases that people have designed where the knob is on the front face of the case.
To change the configuration so that rotating the encoder clockwise increases speed, uncomment (remove the //) following line in your config_buttons.h and change the value to true.
#define ENCODER_ROTATION_CLOCKWISE_IS_INCREASE_SPEED true
Direction of rotation of the encoder when the Loco is reversed
By default, when the loco is reversed, to increase the speed of the loco you need to rotate the encoder in the same direction as when the loco direction is forward. (See the previous heading.)
If you wish to increase speed by rotating the encoder in the opposite direction when the direction is reversed you can add the following define. Uncomment (remove the //) following line in your config_buttons.h.
#define ENCODER_INVERT_ROTATION_WHEN_REVERSED true
Optional Additional Buttons
The way to add additional buttons changed in version 1.83. The old way will continue to work but only the new way is described here.
To use the new format:
USE_NEW_ADDITIONAL_BUTTONS_FORMATmust be set totrueNEW_MAX_ADDITIONAL_BUTTONSmust be set to the number of buttons you want to use. This must be1or more. never 0.
Then the following lists MUST have the same number of elements as NEW_MAX_ADDITIONAL_BUTTONS.
NEW_ADDITIONAL_BUTTON_ACTIONSNEW_ADDITIONAL_BUTTON_LATCHINGNEW_ADDITIONAL_BUTTON_PINNEW_ADDITIONAL_BUTTON_TYPE
[!NOTE]
It is theoretically possible to add up to 11 additional buttons directly to the ESP32.
Pins 5,15,25,26,27,32,33 are the 7 normally used for the buttons.
However:
- One of these becomes unavailable if you have an optional 4x4 keypad
- Also one of these becomes unavailable if you use the battery test
Additionally:
Pins 34,35,36,39 can also be used, but:
- They don’t have an internal pullup, so need and external resister, and they need to configured (in config_buttons.h) as
INPUTrather thanINPUT_PULLUP- One of these pins may used by the optional 4x4 keypad
- One of these pins may used by the optional battery monitor
For NEW_ADDITIONAL_BUTTON_ACTIONS
This array lists the functions or actions assigned to the buttons. See the list of ‘Allowed assignments’ above (or in actions.h).
This has the general form NEW_ADDITIONAL_BUTTON_ACTIONS{val0, val1, .. val10, up-to-val11}
For NEW_ADDITIONAL_BUTTON_LATCHING
This array lists if the functions assigned to the buttons should be latching or not. This is only relevant if the assigned function is for FUNCTION_0 to FUNCTION_31.
This has the general form NEW_ADDITIONAL_BUTTON_LATCHING{val0, val1, .. val10, up-to-val11}
For NEW_ADDITIONAL_BUTTON_PIN
This array lists the pins that the buttons will be attached to.
- For pins on the ESP32 use the number shown on the board/diagram
- If you are using pins on a I2C GPIO Expansion board, they will be numbered: 0-15
- If don’t want to use pin, but retain the entry set it to
-1.
This has the general form NEW_ADDITIONAL_BUTTON_PIN{val0, val1, .. val10, up-to-val11}
For NEW_ADDITIONAL_BUTTON_TYPE
This array lists the type of the pin.
- Set to either INPUT_PULLUP or INPUT. If INPUT, the pin will need an external pullup resister (e.g. 10k)
- Pins 34,35,36,39 can be used but don’t have an internal pullup, so use INPUT for these
This has the general form NEW_ADDITIONAL_BUTTON_TYPE{val0, val1, .. val10, up-to-val11}
See additional information in config_button_example.h.
Example - Click to expand
The following example is for 5 additional buttons, one of which requires the external pullup resister. ``` #define USE_NEW_ADDITIONAL_BUTTONS_FORMAT true #define NEW_MAX_ADDITIONAL_BUTTONS 5 #define NEW_ADDITIONAL_BUTTON_ACTIONS {\ E_STOP,\ CUSTOM_4,\ FUNCTION_2,\ FUNCTION_3,\ FUNCTION_4\ } #define NEW_ADDITIONAL_BUTTON_LATCHING {\ true,\ true,\ true,\ true,\ true\ } #define NEW_ADDITIONAL_BUTTON_PIN {\ 5,\ 15,\ 25,\ 26,\ 39\ } #define NEW_ADDITIONAL_BUTTON_TYPE {\ INPUT_PULLUP,\ INPUT_PULLUP,\ INPUT_PULLUP,\ INPUT_PULLUP,\ INPUT\ } ``` Which is exactly the same as... ``` #define USE_NEW_ADDITIONAL_BUTTONS_FORMAT true #define NEW_MAX_ADDITIONAL_BUTTONS 5 #define NEW_ADDITIONAL_BUTTON_ACTIONS {E_STOP,CUSTOM_4,FUNCTION_2,FUNCTION_3,FUNCTION_4} #define NEW_ADDITIONAL_BUTTON_LATCHING {true,true,true,true,true} #define NEW_ADDITIONAL_BUTTON_PIN {5,15,25,26,39} #define NEW_ADDITIONAL_BUTTON_TYPE {INPUT_PULLUP,INPUT_PULLUP,INPUT_PULLUP,INPUT_PULLUP,INPUT} ``` > *NOTE* > > * The ``\`` at the end of the lines is a continuation. It means that the following line will be treated as part of the line which ends in the ``\``.i.e All the defines can just as easily be written on single lines without the ``\``s. > * The last value in each list *must not* have a comma (,) after it. The other values *must* have the comma (,) after.
Optional use of a EC11 rotary encoder (with no physical resistor pullups) in place of the KY040 encoder module
Internal GPIO pullups required if the hardware build utilises a bare EC11 rotary encoder in place of a KY040 encoder module. (The encoder module has physical pullups fitted)
#define EC11_PULLUPS_REQUIRED true
If the EC11_PULLUPS_REQUIRED is set to false a KY040 module used in hardware build OR bare EC11 used but with physical pullup resistors.
If the EC11_PULLUPS_REQUIRED is set to true an EC11 used for hardware build WITHOUT any physical pullups, GPIO pullups will ne enabled in main.
The default is false.
Optional use of different OLED displays
WitController will support any OLED display with a resolution of 128x64 that is supported by the U8g2 library. This include displays up to 2.4 inch.
The complete list is available here: https://github.com/olikraus/u8g2/wiki/u8g2setupcpp
The OLED_TYPE define will need to be updated to whatever display you have
This is one of the common .9 inch OLED displays (and also for a common 2.4 inch) and is included by default
#define OLED_TYPE U8G2_SSD1306_128X64_NONAME_F_HW_I2C u8g2(U8G2_R0, /* reset=*/ U8X8_PIN_NONE, /* clock=*/ 22, /* data=*/ 23);
This is one of the common 1.3 inch OLED displays
#define OLED_TYPE U8G2_SH1106_128X64_NONAME_F_HW_I2C u8g2(U8G2_R0, /* reset=*/ U8X8_PIN_NONE, /* clock=*/ 22, /* data=*/ 23);
This one works with a 2.42 inch SSD1309 based oLED
#define OLED_TYPE U8G2_SSD1309_128X64_NONAME2_F_HW_I2C u8g2(U8G2_R0, /* reset=*/ U8X8_PIN_NONE, /* clock=*/ 22, /* data=*/ 23);
See config_buttons_example.h for more information.
Optional use of a potentiometer (pot) instead of the encoder for the throttle
config_buttons.h can include the following optional defines:
#define USE_ROTARY_ENCODER_FOR_THROTTLE false#define THROTTLE_POT_PIN 39#define THROTTLE_POT_USE_NOTCHES true#define THROTTLE_POT_NOTCH_VALUES {1,585,1170,1755,2340,2925,3510,4094}#define THROTTLE_POT_NOTCH_SPEEDS {0,18,36,54,72,90,108,127}
If USE_ROTARY_ENCODER_FOR_THROTTLE is set to false the rotary encoder is ignored for thottle/speed control and a pot on the pin defined with THROTTLE_POT_PIN will be used instead.
You must specify the PIN to be used. Currently PINs 34, 35 and 39 are the only ones that cannot be used by the app for other purposes, so these are the safest to use. This should be connected to the centre pin of the pot. The 3v and GND should be connected to the outer pins of the pot.
The pot can be set to have 8 defined ‘notches’ (the default) or just a linear value.
If you want to have the 8 notches:
a) You must define the values the pot will send at each of 8 points - THROTTLE_POT_NOTCH_VALUES. Note that you should avoid the value zero (0) for notch zero. Use at least 1 instead.
The example values above are useble for a 10k ohm pot but any value pot can be used. Just adjust the numbers.
b) You must define what speed should be sent for each notch - THROTTLE_POT_NOTCH_SPEEDS
If you want a linear speed instead of notches:
a) You must define the values the pot will send at at zero throw and full throw in the first and last of the 8 values in THROTTLE_POT_NOTCH_VALUES. The other values will be ignored but you still need to include 8 values. (They can be zero.) Note that you should avoid the value zero (0) for notch zero. Use at least 1 instead.
Sumner Patterson has developed an app to help find the appropriate pot values for the THROTTLE_POT_NOTCH_VALUES.
Optional use of a voltage divider to show the battery charge level
See diagram above for how to wire in the volage divider. 47k resistors are used, but this can be varied as long as the output to the pin is limited to below 3.3v. See additional information related to the Pangodream Library that WiTcontroller uses here… https://www.pangodream.es/tag/18650-ion-li
The diagram has the voltage divider spliced into battery leads, but you can solder the positive in to the back of the battery connector (on the ESP32) if you prefer. The ground can be taken from any ground pin.
To enable the battery monitor, set the following to true. The default is false.
#define USE_BATTERY_TEST true
To set which pin to use. The default is 34. In theory 34, 35, 36, or 39 should be able to be used, but only 34 and 36 have been tested. (36 is marked ‘VP’ on the board. 39 is marked ‘VN’ on the board.)
#define BATTERY_TEST_PIN 34
If the battery does not show 100% when plugged into the charger, you may need to adjust this value. The default is 1.7.
#define BATTERY_CONVERSION_FACTOR 1.7
To help work out the correct BATTERY_CONVERSION_FACTOR, you can enable some serial monitor messages that will assist.
In your config_buttons.h add (or uncomment -remove the //) this define:
#define WITCONTROLLER_DEBUG 0
a) Make sure your battery is fully charged first!
b) Upload the code WiTcontroller code if you have not already done so.
c) Open the serial monitor.
d) Wait. (Don’t connect to a WiThrottle server.)
You will see lines like…
  BATTERY TestValue: 100 (10003)
  BATTERY lastAnalogReadValue: 2491 (10003)
  BATTERY If Battery full, BATTERY_CONVERSION_FACTOR should be: 1.69 (10014)
Let it run for a while.
e) Note one of the recommended values (it will vary a bit) and enter it into the define in your config_buttons.h
f) Re-upload code and connect to a server
g) Confirm that the battery reads 100% (repeat if not)
h) Run the WiTcontroller on battery for few hours and confirm the battery level is droping at an expected rate.
(adjust the conversion factor if not.)
To show the calculated percentage, set the following to true The default is false.
#define USE_BATTERY_PERCENT_AS_WELL_AS_ICON true
To force the WiThrottle to go to sleep at a specific level, set this value. (e.g. to 3 or 5.) A value of less than zero (e.g. -1) will disable the feature. By default it is disabled (-1).
#define USE_BATTERY_SLEEP_AT_PERCENT 3
The display of the battery can be temporarily toggled by setting a key or button to SHOW_HIDE_BATTERY. The display will cycle between none, icon only and icon plus percent value. Note that USE_BATTERY_TEST must be set to true for this to have any effect. By default it is disabled (0).
[!NOTE]
I recommend adding a physical power switch to disconnect the battery as this feature will, slowly, continually drain the battery, even when not being used.
YaMoRC Command Stations / Heartbeat Period
#define DEFAULT_HEARTBEAT_PERIOD 10
The heartbeat period defaults to 10 seconds. The server should send the period that it is expecting on connection and overide the default, so generally you should never need to adjust this.
It is believed that the YaMoRC Command Stations are not sending this as the should (according to the WiThrottle specification). For those, and any other WiThrottle that do not send it, uncomment or add the define above and adjust the number of seconds to match the setting on the server.
Optional Startup Commands
#define STARTUP_COMMAND_1 "" .. #define STARTUP_COMMAND_4 ""
Optional. If defined, up to four commands will be executed, in order, after connection to the WiThrottle Server. Each must be ONLY ONE single valid command. Either a direct action or a menu action. Any can be blank or not defined, the others will still be executed.
[!NOTE]
Selecting from the roster, routes, turnouts/points, etc. is not possible as the commands will execute before the roster, routes, turnouts/points load.
Optionally automatically acquire the only loco in the roster
#define ACQUIRE_ROSTER_ENTRY_IF_ONLY_ONE true
Enabling this option will automatically acquire the only roster entry after connection to the WiThrottle Server, but only if there is only one roster entry.
Optional Guest Mode
Modified from code by Will Jayne - Coventry Railworks
Guest mode allows you to lock the keyboard by pressing and holding two additional buttons together for 1 second (default). Any additional buttons can be configured to activate/deactivate this. The feature is not enabled by default.
Guest Mode shows a lock indicator on screen and can optionally illuminate a LED indicator. It disables any kepad inputs as well as the “next throttle” function.
I added this primarily so that children can use the throttle and quick function buttons, without accidentally entering any menu. Will
The feature is not enabled by default. The featue can only be activted from the Throttle Speed screen. (i.e. not in a menu.)
#define GUEST_MODE_ENABLED true
Pins for the ‘Additional Buttons’ that need to be pressed to activate/deactivate the feature. Defaults to 5 and 15, which are the first two default additional button pins. These must correspond to two of the ‘additional buttons’ pins. (See above)
#define GUEST_MODE_PIN_1 5
#define GUEST_MODE_PIN_2 5
Optional LED indicator PIN number. Defaults to disabled (-1)
#define GUEST_MODE_LED_PIN 2
Timing parameters
#define GUEST_MODE_HOLD_DURATION 1000
#define GESTURE_PARTNER_WINDOW 250
Optionally allow access to the direct keypad commands. .i.e. everything except ‘*’. Defaults to false.
#define GUEST_MODE_ALLOW_DIRECT_KEYBOARD_COMMANDS true
Optionally allow access to the other throttles (NEXT_THROTTLE). Defaults to false.
#define GUEST_MODE_ALLOW_NEXT_THROTTLE true
Note: Holding the guest mode activation mode buttons can currently be problematic if you have assigned custom menu commands (see below) to those buttons. I am working on a solution for that.
Optional Search Function commands
Modified from code by Will Jayne - Coventry Railworks
From version 1.113, some additional asignable commands are available: HORN_OR_WHISTLE_SEARCH, HORN_SEARCH, WHISTLE_SEARCH and BRAKE_SEACH
If one of these are assigned to an ‘Additional Button’, when it is pressed, it will search for the term (“Horn” or “Whistle”, “Horn”, “Whistle” or “Brake”) in the available functions in the current loco, and activate/deacivate the first function it finds that contains that term. Optionally, it will activate any one of the functions that conatin the term randomly.
You can change the terms they search for by adding (or uncommenting) a define in config_buttons.h , e.g. to the search for “Siren” instead of “Horn” use (case insensitive):
#define FUNCTION_SEARCH_LABELS { {"Siren","Whistle"}, {"Siren",""}, {"Whistle",""}, {"Brake",""}, {"Bell",""} }
Note: Each search term is a either/or pair. e.g. {"Horn","Whistle"} Either of the two term eill be concidered a match. If you only want to one work, leave the second word as an empty string. e.g. {"Horn",""}
You can also add additional search term by redefining all the required terms
e.g. To add “Bell” and “Mute” searches you would add all the lines below:
#define BELL_SEARCH 900 // abitrary name. number must be 900 or greater and be unique
#define MUTE_SEARCH 901 // abitrary name. number must be 900 or greater and be unique
#define MAX_FUNCTION_SEARCH 6
#define FUNCTION_SEARCH_LABELS { {"Horn","Whistle"}, {"Horn",""}, {"Whistle",""}, {"Brake",""}, {"Bell",""}, {"Mute",""} }
#define FUNCTION_SEARCH_IDS {HORN_OR_WHISTLE_SEARCH, HORN_SEARCH, WHISTLE_SEARCH, BRAKE_SEARCH, BELL_SEARCH, MUTE_SEARCH}
Then assign an ‘additional button’ to BELL SEARCH or MUTE_SEARCH.
Note: The name of each ???_SEARCH can be anything, but must be unique. The assigned number must 900 or greater, and must be unique.
By default only the first matching function will be activated. You can instead have one random of the matching functions be activated by enabling (uncommenting) the following define:
#define FUNCTION_SEARCH_RANDOM_MATCH true
Additional/Optional User Defined Commands
Up to 11 custom Withrotle commands can be assigned to the additional buttons.
These can be any legitimate WiThrottle protocol command enclosed in quotes or double quotes. refer to https://www.jmri.org/help/en/package/jmri/jmrit/withrottle/Protocol.shtml
These are created by assing values to CUSTOM_COMMAND_1 to CUSTOM_COMMAND_11. e.g.
#define CUSTOM_COMMAND_1 "HMHello World" // alert message
#define CUSTOM_COMMAND_2 "PRA2R500" // set route R500  (DCCEX system route prefix is 'R')
To use these custom WiThrottle commands on additional buttons you assign the button the value CUSTOM_1 to CUSTOM_11. (See the example above.)
Note: The definition of the command and what you assign to the additional button are different.
Additional / optional Custom Menu Select Commands
Up to 11 custom menu commands can be assigned to the additional buttons.
These can be any legitimate menu character sequence. Each can can contain multiple commands.
These are created by assing values to CUSTOM_MENU_SELECT_COMMAND_1 to CUSTOM_MENU_SELECT_COMMAND_1. e.g.
#define CUSTOM_MENU_SELECT_COMMAND_1 "*1" // Open the add loco menu screen
#define CUSTOM_MENU_SELECT_COMMAND_2 "*1999#" // Select loco 999 and return to the throttle screen
#define CUSTOM_MENU_SELECT_COMMAND_3 "*2#*1888#*1999#" // Drop the current locos, then select locos 888 and 999 and return to the throttle screen
To use these custom menu commands on additional buttons you assign the button the value CUSTOM_MENU_SELECT_1 to CUSTOM_MENU_SELECT_11. (See the example above.)
Note: The definition of the command and what you assign to the additional button are different. Note: Custom menu commands are fully disabled in guest mode.
WiFi Scanning options
#define USE_FAST_WIFI_SCAN_METHOD true
To do a Fast Scan for SSIDs, uncomment or add the line above in your config_network.h. Fast scans are not as through. By default this option is disabled.
#define SORT_WIFI_NETWORKS true
The ‘found’ SSIDs will not be sorted by default (from version v1.98). To restore this feature, uncomment or add the line above in your config_network.h. If enabled, the SSIDs are sorted by signal strength. By default this option is disabled.
[!NOTE]
Sorting can’t be used if the Fast Scan is enabled.
#define BYPASS_WIFI_SCAN_ON_STARTUP true
This option to allows you to bypass the initial WiFi scan. The WiTcontroller will instead show you the list of SSIDs you have defined in config_network.h. From that you can still to the scan if you wish by pressing #. By default this option is disabled and the network will be scanned at startup.
[!NOTE]
Some ESP32s seem to have an intermitient WiFi problem that causes the WifI Scan to lockup the device. This option may be may be useful in this situation.
Languages and localisation
Instructions for German Translations - Anleitung für deutsche Übersetzungen
The file language_deutsch.h contains German translations (by Bastian Zechendorf). Uncomment (or add) the #include "language_deutsch.h" line in config_buttons.h to see menus and messages in German.
You can override any of these translations individually by adding an appropriate #define statement in the config_buttons.h, but it must be before the #include... statement.
Die Datei language_deutsch.h enthält deutsche Übersetzungen (von Bastian Zechendorf). Kommentieren Sie die Zeile #include "language_deutsch.h" in config_buttons.h aus (oder fügen Sie sie hinzu), um Menüs und Meldungen auf Deutsch anzuzeigen.
Sie können jede dieser Übersetzungen einzeln überschreiben, indem Sie eine entsprechende #define -Anweisung in config_buttons.h hinzufügen, diese muss jedoch vor der #include... -anweisung stehen.
Ich würde mich über jede Hilfe zur Verbesserung dieser Übersetzungen freuen. Bei Interesse kontaktieren Sie mich bitte direkt für eine Anleitung.
Instructions for Italian Translations - Istruzioni per la traduzione in Italiano
Il file language_italiano.h contiene la traduzione italiana (by Roberto B). Rimuovere il commento o aggiungere la linea #include language_italiano.h nel file config_buttons.h per avere menù e messaggi in Italiano.
Si può sovrascrivere una qualunque di queste traduzioni individualmente aggiungendo la relativa #define nel file config_buttons.h ma deve essere fatto assolutamente prima dell’ #include... della traduzione.
Qualunque contributo è gradito. Per ogni questione, il contatto ufficiale è il canale Discord di DCC-EX nella sezione wifi-throttles.
Instructions for Dutch Translations - Instructies voor de Nederlandse vertalingen
Het bestand language_nederlands.h bevat de Nederlandse vertalingen (door Hans Metselaar). Verwijder het commentaar voor de regel #include "language_nederlands.h" (of voeg deze toe) in config_buttons.h om de menu’s en meldingen in het Nederlands weer te geven.
Je kunt ieder van deze vertalingen individueel overschrijven door het desbetreffende #define statement in de config_buttons.h toe te voegen, deze moet dan voor het #include... statement worden geplaatst.
Instructions for Chinese Translations - 中文翻译说明
The file [language_chinese.h] contains Chinese translations (by Lin Huiyu).
To see menus and messages in Chinese:
- Uncomment (or add) the
#include "language_chinese.h"line inconfig_buttons.h. - Uncomment (or add) the
#define FONT_DEFAULT u8g2_font_boutique_bitmap_7x7_t_gb2312line inconfig_buttons.h. - Uncomment (or add) the
#define FONT_DIRECTION u8g2_font_wqy13_t_gb2312aline inconfig_buttons.h.
You can override any of these translations individually by adding an appropriate #define statement in the config_buttons.h, but it must be before the #include... statement.
文件 [language_chinese.h] 包含的中文翻译内容,由林辉玉完成。
如需显示中文菜单与信息,请按以下步骤操作:
- 在
config_buttons.h文件中,取消注释(或添加)此行:#include "language_chinese.h"。 - 在
config_buttons.h文件中,取消注释(或添加)此行:#define FONT_DEFAULT u8g2_font_boutique_bitmap_7x7_t_gb2312。 - 在
config_buttons.h文件中,取消注释(或添加)此行:#define FONT_DIRECTION u8g2_font_wqy13_t_gb2312a。
您可以在 config_buttons.h 文件中通过添加相应的 #define 预编译宏定义来个别覆盖这些翻译,但该定义必须出现于 #include... 语句之前。
Instructions for Other Translations
If you create a copy of the file language_deutsch.h (with a new name) and change the German text it contains to any language you wish (using the English text on the right as a guide to what is needed) you can add that file as an include in config_buttons.h.
I would welcome it if you then sent me the file you created for inclusion in this repository.
I would appreciate any assistance to improve or add to the translations. If you are interested, please contact me directly for instructions.
Modifying the code
If you plan to modify the code to make you own version, it is recommended that you create your own GitHub fork of my repository and post your mods there.
Instructions on how to do so are here.
Change Log
See full change log/ version history
Contact Me
I can be contacted by:
a) Via email akersp62 @ gmail.com (remove the spaces)
b) On the ‘wifi-throttle’ Channel on the DCC-EX Discord server https://discord.gg/8ghsjsBup8. My handle is flash62au (Peter A)
c) By creating an ‘Issue’ here on GitHub. (Not recommended, but I will respond.)